

Are you ready to take your woodworking skills to the next level? Knowing how to use a planer tool can make your projects smoother, faster, and more precise.
Whether you’re fixing rough boards or shaping wood just the way you want, mastering this tool puts control right in your hands. You’ll discover simple steps and insider tips that will help you use a planer safely and effectively. Keep reading, and soon you’ll be working like a pro, turning ordinary wood into something truly impressive.
Choosing The Right Planer
A planer is a tool that smooths and flattens wood surfaces. Picking the right planer helps you get good results. The right choice depends on your projects and skills.
There are many types of planers. Each type works best for certain jobs. You should know what to look for before buying.
Types Of Planers
Planers come in different forms. The main types are handheld, benchtop, and stationary planers. Each type suits different tasks.
- Handheld Planers:Light and easy to carry. Good for small jobs and edges.
- Benchtop Planers:Small machines placed on a table. Ideal for medium projects.
- Stationary Planers:Large machines for heavy work. Used in workshops for big wood pieces.
Selecting Based On Project Needs
Think about what you will use the planer for. The size and type of wood matter. Also, consider how often you will use it.
- For small repairs or edges, handheld planers work well.
- For furniture or cabinets, benchtop planers are better.
- For large wood pieces, choose stationary planers.
- If you plan many projects, pick a durable and powerful planer.
Essential Features To Look For
Some features make a planer easier and safer to use. Look for these features before buying.
- Adjustable Depth:Lets you control how much wood is removed.
- Sharp Blades:Ensure clean cuts and smooth finishes.
- Dust Collection:Keeps your workspace clean and safe.
- Comfortable Handle:Makes it easier to hold and guide the planer.
- Powerful Motor:Helps handle tough wood without slowing down.

Credit: www.familyhandyman.com
Preparing Your Workspace
Using a planer tool needs a well-prepared workspace. A tidy and organized area helps you work safely and efficiently.
Before starting, take time to set up your space. This guide will help you prepare for your planing tasks.
Setting Up A Stable Surface
Choose a flat and strong surface to place your wood and planer. This surface must not move or wobble during use.
A stable surface keeps your work safe and makes your cuts smooth. Use a heavy workbench or a sturdy table.
- Check the surface for any cracks or damage
- Clear the area of clutter and dust
- Use clamps to hold the wood steady
- Make sure the surface height is comfortable for you
Safety Precautions
Planer tools can cause injuries if not used carefully. Follow safety rules to protect yourself.
Wear safety gear and keep your hands away from moving parts. Always turn off the tool before adjusting it.
- Wear safety goggles to protect your eyes
- Use ear protection to guard against noise
- Wear a dust mask to avoid breathing wood dust
- Keep loose clothing and hair tied back
- Keep children and pets away from the workspace
Gathering Necessary Tools
Have all the tools ready before you start planing. This saves time and keeps your work smooth.
Besides the planer tool, you need some basic items to help you work well and safely.
- Planer tool with sharp blades
- Measuring tape or ruler for checking wood size
- Clamps to hold wood steady
- Brush or cloth to clean wood surface
- Safety gear like goggles, gloves, and mask
- Sandpaper for finishing touches
Planer Tool Components
A planer tool smooths and flattens wood surfaces. It has several important parts to work well.
Knowing the main components helps you use the planer safely and effectively.
Blade And Cutter Head
The blade is sharp and cuts thin layers from the wood. It is attached to the cutter head.
The cutter head spins the blade quickly to make smooth cuts. It is important to keep blades sharp.
- Blade: sharp edge for cutting wood
- Cutter head: holds and spins the blade
- Replace or sharpen blades to keep cuts clean
Depth Adjustment Controls
Depth controls set how much wood the blade removes. You adjust this before you start planing.
These controls help set the blade height to match the wood thickness and smoothness you want.
- Adjust depth to remove thin or thick layers
- Use knobs or levers for precise control
- Always test on scrap wood first
Feed Rollers And Table
Feed rollers pull the wood into the planer. They move the wood at a steady speed for smooth cuts.
The table supports the wood as it moves. It keeps the wood level and stable during planing.
- Feed rollers grip and push wood through
- Table holds wood steady and flat
- Clean rollers and table for best results
Setting Up The Planer
Using a planer tool correctly starts with proper setup. This ensures smooth operation and clean cuts. You need to pay attention to blade condition, depth, speed, and alignment.
Each part affects the quality of your work and your safety. Follow the steps below to get your planer ready for use.
Installing And Sharpening Blades
Blades must be sharp and installed correctly. Dull blades cause rough surfaces and may damage the tool. Always check blade condition before use.
- Turn off and unplug the planer before handling blades.
- Remove the blade cover to access the blades.
- Check blades for chips or dull edges.
- Sharpen blades using a sharpening stone or replace if damaged.
- Install blades back securely in their slots.
- Tighten screws to hold blades firmly.
- Replace the blade cover before starting the tool.
Adjusting Depth And Speed
Set the cutting depth for the amount of wood to remove. Adjust speed to match the wood type and finish quality you want. Correct settings prevent damage and ensure smooth results.
| Setting | Recommended Range | Effect |
|---|---|---|
| Cutting Depth | 0.5 mm to 3 mm | Controls wood removal per pass |
| Speed | Low to High (varies by model) | Affects finish smoothness and tool control |
Checking For Proper Alignment
Proper alignment keeps the planer running straight and prevents uneven cuts. Check the tool’s base and blades for level and parallel settings before each use.
To check alignment:
- Place a straightedge along the planer base to ensure it is flat.
- Inspect blade positions to confirm they are parallel to the base.
- Adjust blade height screws if blades are uneven.
- Tighten all adjustment screws securely.
Using The Planer Safely
Using a planer is a common woodworking task. It helps smooth and shape wood surfaces. Safety is very important when using this tool.
Following safety steps protects your hands and body. It also helps you get good results. Learn how to use the planer safely below.
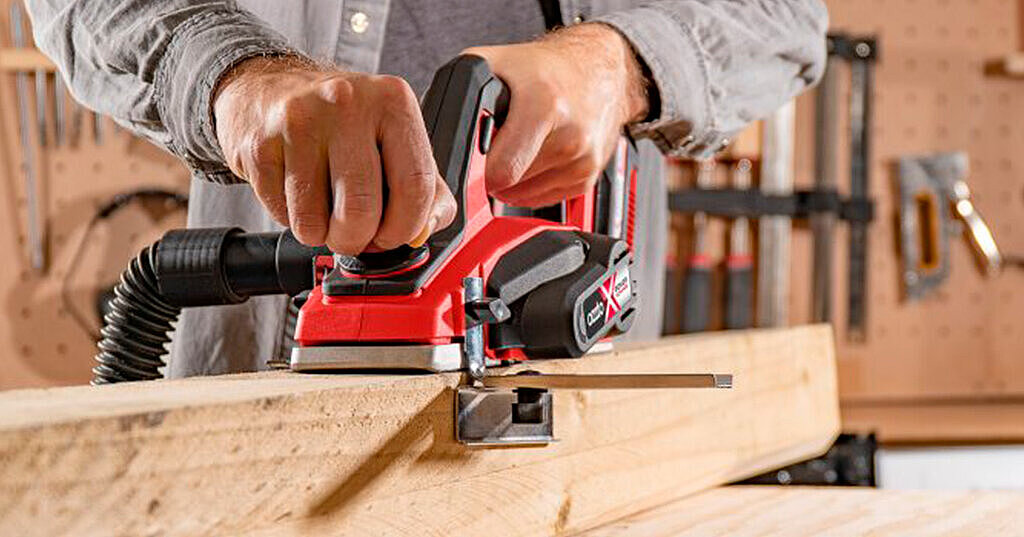
Correct Hand Positioning
Keep your hands away from the blades. Use both hands to hold the planer firmly. One hand should be on the front handle. The other hand should be on the back handle.
Do not place your hands near the cutting area. Always keep a safe distance. This prevents accidental cuts or injuries.
- Hold the front handle with your left hand
- Hold the rear handle with your right hand
- Keep fingers clear of the blade path
- Wear gloves for extra protection
Feeding Wood Properly
Feed the wood slowly and steadily into the planer. Do not force the wood too fast. Let the planer do the work with steady pressure.
Keep the wood flat and straight as you feed it. This helps avoid jams and uneven cuts. Always check the wood for nails or screws before planing.
- Start feeding wood at a slow speed
- Keep pressure even and steady
- Watch for knots or hard spots in wood
- Stop if you hear strange noises
Avoiding Common Mistakes
Do not remove too much wood in one pass. Take several thin passes for better results. Avoid planing warped or twisted wood without support.
Never leave the planer running unattended. Always unplug the tool after use. Clean the planer blades regularly to keep them sharp and safe.
- Take light cuts, not deep ones
- Use a flat surface to support wood
- Turn off and unplug when not in use
- Keep blades clean and sharp

Credit: www.youtube.com
Achieving Smooth Surfaces
Using a planer tool can help you achieve smooth surfaces on wood. This guide will walk you through important techniques to use.
Learn to handle the planer effectively to get the best results. Each step helps refine the wood surface.
Multiple Pass Techniques
Multiple passes with the planer ensure an even and smooth finish. Start with light passes and gradually increase pressure.
- Set the depth of the planer to a low setting.
- Make the first pass along the wood grain.
- Check for smoothness and adjust depth if needed.
- Repeat until the desired smoothness is achieved.
Dealing With Knots And Grain
Knots and wood grain can be tricky. They require careful attention to avoid rough patches.
Use a sharp planer blade to reduce tear-out. For knots, move slowly and apply consistent pressure.
Finishing Touches
After planing, final touches can enhance the wood’s appearance. Sanding and sealing are key steps.
| Final Steps | Purpose |
| Sanding | To remove any remaining roughness |
| Sealing | To protect the wood surface |
| Polishing | To enhance the wood’s shine |
Maintenance Tips
Keeping your planer tool in good condition ensures it works well for a long time. Regular maintenance is key to achieving the best results with your woodworking projects.
Follow these simple steps to maintain your planer and keep it functioning smoothly.
Cleaning After Use
Clean your planer after every use to remove wood shavings and dust. This prevents buildup and ensures smooth operation.
Use a small brush or compressed air to clean hard-to-reach areas. This helps maintain the tool’s performance.
Blade Care And Replacement
Blades are crucial for the planer’s efficiency. Dull blades can ruin your workpiece and damage the tool.
- Check blades regularly for sharpness.
- Replace blades when they become dull.
- Use manufacturer-recommended blades for best results.
Storage Recommendations
Proper storage protects your planer from damage and prolongs its life. Keep it in a dry place to prevent rust.
| Storage Tip | Benefit |
| Use a tool case | Prevents dust accumulation |
| Keep away from moisture | Avoids rusting |
| Store in a secure place | Reduces risk of damage |

Credit: www.findbuytool.com
Troubleshooting Common Issues
Using a planer tool can be easy if you know how to solve common problems. This guide helps you fix issues that may happen during planing.
Fixing these problems quickly keeps your work smooth and your wood pieces perfect.
Snipe And How To Prevent It
Snipe happens when the planer cuts too deep at the start or end of a board. It leaves unwanted gouges or dips on the wood.
To prevent snipe, support the board well and feed it evenly. Avoid letting the board dip as it enters or leaves the planer.
- Use infeed and outfeed supports to hold the board level
- Feed the board steadily without stopping
- Raise the planer’s rollers slightly if adjustable
- Try planing a scrap piece first to check for snipe
Uneven Planing Solutions
Uneven planing means the wood surface is not flat or smooth after passing through the planer. This can happen from dull blades or wrong settings.
Check your blades often and change them if they are dull. Adjust the depth of cut in small steps to avoid uneven surfaces.
- Sharpen or replace planer blades regularly
- Set the cutting depth to a shallow setting
- Make multiple passes instead of one deep cut
- Feed the wood slowly and evenly
- Check the wood for knots or hard spots before planing
Noise And Vibration Fixes
Excess noise or vibration can mean parts are loose or the planer is not balanced. This can damage the tool or cause bad cuts.
Make sure all screws and bolts are tight. Clean the planer to remove dust and debris that cause imbalance.
- Tighten all screws and bolts before use
- Clean the blades and rollers from dust and chips
- Check the cutter head for damage or wear
- Place the planer on a stable, flat surface
- Use anti-vibration mats if the floor is uneven
Frequently Asked Questions
What Is The Primary Use Of A Planer Tool?
A planer tool smooths and flattens wood surfaces. It removes thin layers for an even finish. It’s essential for woodworking projects needing precision.
How Do I Set The Depth On A Planer?
Adjust the depth by turning the depth control knob. Set it according to the thickness you want to remove. Always start with a shallow depth for safety.
Can A Planer Tool Fix Warped Wood?
Yes, a planer can flatten warped wood by shaving off high spots. However, severe warping may require additional tools or techniques for best results.
What Safety Tips Should I Follow Using A Planer?
Always wear safety goggles and hearing protection. Keep hands clear of the blade area. Use clamps to secure wood before planing.
Conclusion
Using a planer tool can make your woodworking smooth and easy. Always follow safety steps to avoid accidents. Keep the blade sharp for the best results. Practice on scrap wood before your main project. Take your time and work carefully for a clean finish.
With patience, your skills will improve quickly. A good planer helps you shape wood just right. Try different techniques to find what works best. Enjoy the process and create beautiful wood pieces.