

Want to create perfect, smooth lines in Photoshop but don’t know where to start? You’re in the right place.
Mastering the Pen Tool can feel tricky at first, but once you get the hang of it, you’ll be able to draw precise lines with ease. This guide will walk you through every step, helping you unlock a powerful skill that can take your designs to the next level.
Keep reading—you’ll be surprised how simple it can be to draw clean, professional lines with the Pen Tool.
Getting Started With The Pen Tool
The Pen Tool in Photoshop is a precise way to draw lines and shapes. It creates paths you can edit and use for different designs.
Before drawing, it helps to know where the Pen Tool is and how to set up your workspace. This guide will show you both.
Locating The Pen Tool
You can find the Pen Tool in the Photoshop toolbar on the left side of the screen. It looks like a fountain pen tip.
- Look for the Pen icon in the toolbar.
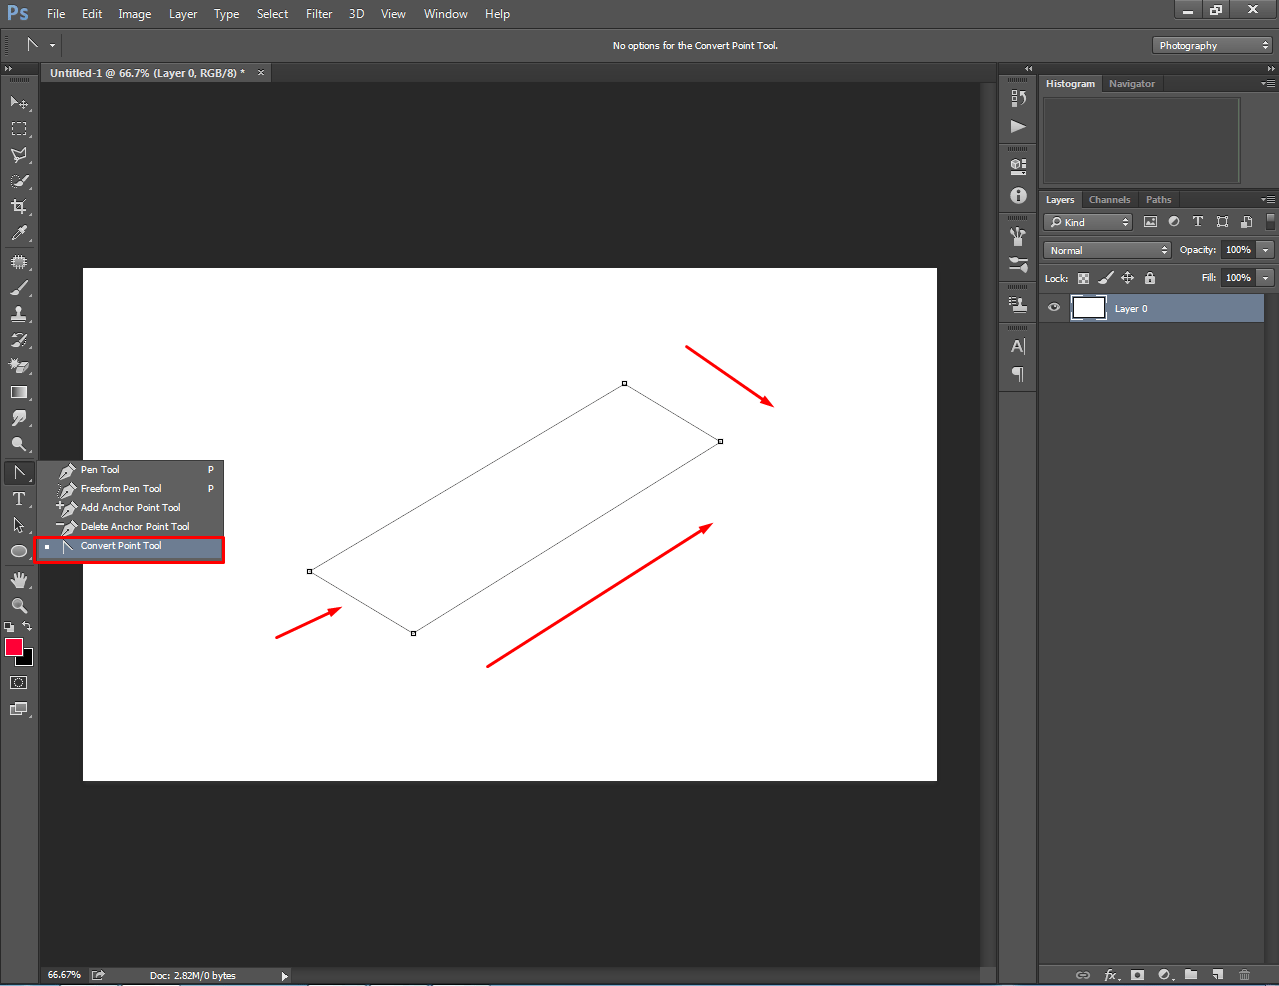
- If you don’t see it, click and hold the icon that looks like a fountain pen or the freeform pen.
- Select the Pen Tool from the fly-out menu.
- You can also press the letter
Pon your keyboard to activate it quickly.
Setting Up Your Workspace
Setting up your workspace helps you use the Pen Tool more easily. You can arrange panels and tools to fit your needs.
| Workspace Element | Purpose | How to Adjust |
| Layers Panel | Manage and organize your paths and shapes | Go to Window > Layersto show or hide |
| Paths Panel | View and edit paths created by the Pen Tool | Open via Window > Paths |
| Options Bar | Change Pen Tool settings like path type and mode | Located at the top under the menu bar |
| Zoom and Navigation | Zoom in and out for precise clicking | Use Zoom Toolor keyboard shortcuts (Ctrl +or Cmd +) |
Credit: clippingway.com
Creating Your First Line
The Pen Tool in Photoshop lets you draw precise lines and shapes. It uses anchor points to create paths.
Learning to draw a straight line with the Pen Tool is a great way to start working with vector paths.
Placing Anchor Points
Anchor points are the main points you place to define the path. You click to add them with the Pen Tool.
- Choose the Pen Tool from the toolbar.
- Click on your canvas to place the first anchor point.
- Click somewhere else to place the next anchor point.
- The line will connect the points in the order you click.
Drawing Straight Lines
To draw a straight line, place two anchor points without dragging the mouse. This creates a straight segment between them.
| Action | Result |
| Click without dragging | Creates a straight line segment |
| Click and drag | Creates a curved line segment |
| Close path by clicking first point | Forms a complete shape |
Adjusting Your Line
After drawing a line with the Pen Tool in Photoshop, you can change its shape. Adjusting your line lets you create smooth or sharp curves. You work by moving points or changing curves.
This guide shows how to move anchor points and modify line curves. These changes help you perfect your design easily.
Moving Anchor Points
Anchor points control the shape of your line. You can move them to change the line’s direction or length. Select the Direct Selection Tool to click and drag these points.
- Click an anchor point to select it.
- Drag the point to a new place.
- Hold Shift to move the point straight up, down, left, or right.
- Delete points to simplify the line if needed.
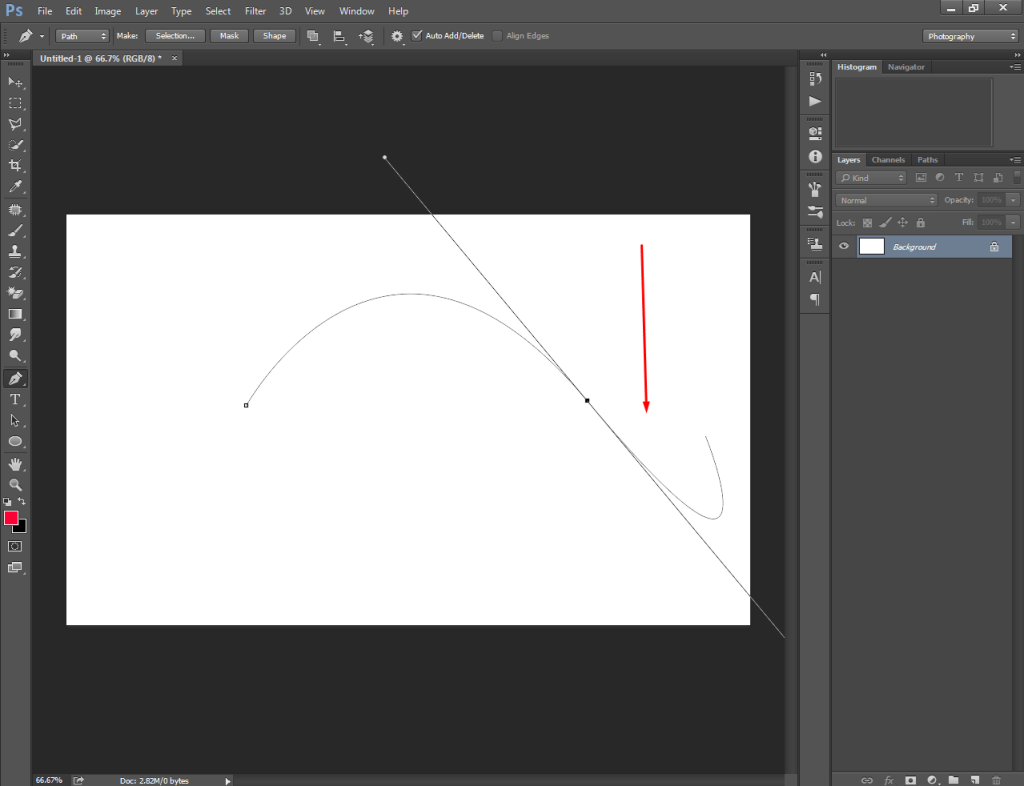
Modifying Line Curves
Curves on your line come from handles attached to anchor points. Moving these handles changes the curve’s shape and smoothness. Use the Direct Selection Tool to adjust them.
| Action | Effect on Curve |
| Drag handle away from anchor | Curve becomes larger and smoother |
| Drag handle closer to anchor | Curve tightens and becomes sharper |
| Move handle in different directions | Curve bends in that direction |
| Hold Alt (Option) and drag handle | Change one handle without affecting the other |
Credit: clippingway.com
Styling The Line
After drawing a line with the Pen Tool in Photoshop, you can style it to fit your design. Styling helps your line look clear and attractive.
Photoshop offers simple ways to change the line’s color and thickness. These options make your line stand out or blend in.
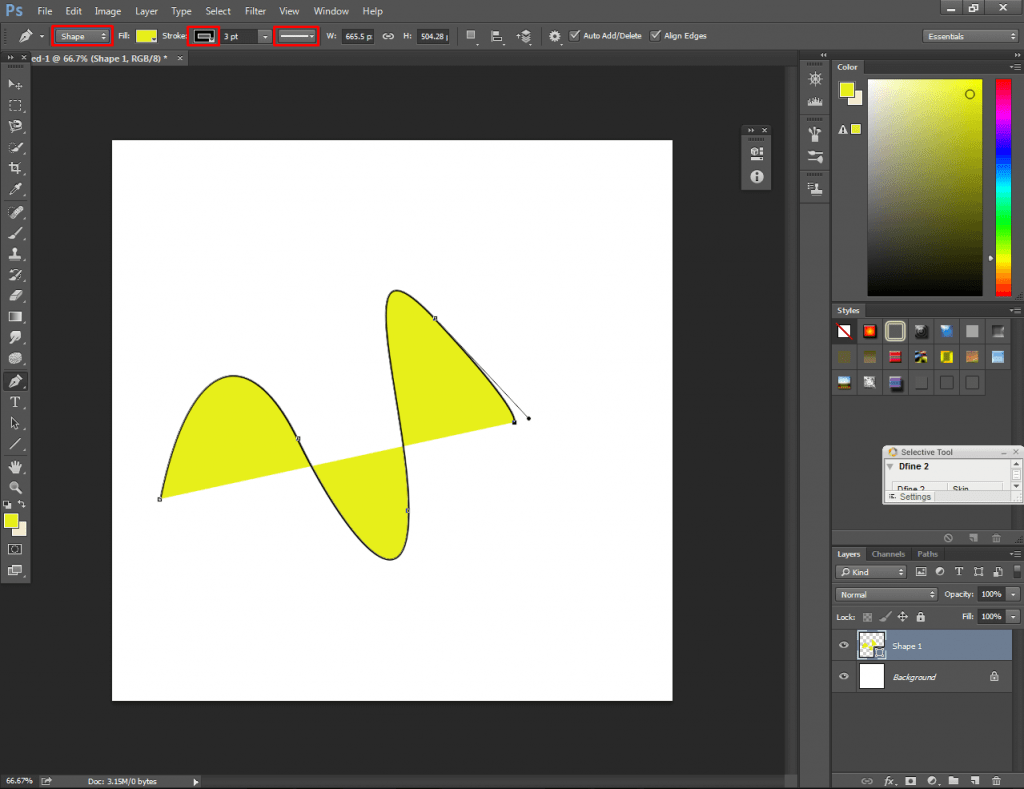
Changing Stroke Color
You can change the stroke color to make your line brighter or softer. This helps match the line with other parts of your image.
To change the stroke color, open the Properties panel or the toolbar. Click on the stroke color box and pick a new color. You can use the color picker or enter a color code.
- Click the line to select it.
- Find the stroke color box in the toolbar or Properties.
- Choose a new color from the color picker.
- Press OK to apply the color.
Adjusting Stroke Width
Stroke width changes how thick or thin your line looks. A thicker line is bolder, and a thinner line is more subtle.
To adjust stroke width, select your path and find the stroke width option. Enter a new number or use the slider to change the width. Watch the line as it changes to find the right size.
- Select the line or path.
- Locate the stroke width setting in the Properties panel.
- Increase or decrease the number to change thickness.
- Confirm the change to see the result.
Saving And Exporting Your Work
After drawing a line with the Pen Tool in Photoshop, saving your work is important. This keeps your file safe for future edits.
Exporting your work lets you share or use your image outside Photoshop. You can choose different file types for different needs.
Saving Photoshop Files
Save your file as a Photoshop document to keep all layers and paths intact. This allows you to edit the line later.
Use the “Save As” option and select the PSD format. Give your file a name and choose a folder to save it.
- Go to File > Save As
- Choose Photoshop (.PSD) format
- Name your file clearly
- Click Save
Exporting As Image Formats
Export your image to use it on websites or share it easily. Common formats are JPEG, PNG, and TIFF.
Choose the export option that matches your needs. PNG keeps transparency, JPEG is good for photos, and TIFF is high quality.
- Go to File > Export > Export As
- Select the format: JPEG, PNG, or TIFF
- Adjust settings like quality and size
- Click Export and choose a save location
Credit: clippingway.com
Frequently Asked Questions
How Do I Draw A Straight Line With The Pen Tool In Photoshop?
To draw a straight line, click to create the first anchor point. Then, hold Shift and click the second point. This constrains the line to 45-degree angles, making it perfectly straight. Press Enter to finalize the path.
Can I Edit A Line After Drawing With The Pen Tool?
Yes, use the Direct Selection Tool (white arrow) to adjust anchor points or handles. This lets you reshape the line precisely. You can also add or delete anchor points for more control.
What Settings Improve Line Quality With The Pen Tool?
Use a high-resolution canvas and zoom in for accuracy. Enable “Rubber Band” in Pen Tool options to preview curves. Set stroke thickness and color in the Paths panel to enhance visibility.
How To Convert Pen Tool Paths To Visible Lines In Photoshop?
After creating a path, open the Paths panel. Click “Stroke Path” and choose Brush or Pencil tool. This applies a visible line over the path using your current brush settings.
Conclusion
Drawing a line with the Pen Tool in Photoshop is simple. Practice helps you gain confidence and skill. Use the steps often to improve your work. The Pen Tool allows precise and clean lines every time. Experiment with different shapes and curves for variety.
Keep your workspace organized for faster editing. Soon, creating lines will feel natural and easy. Enjoy the process and watch your designs improve.