

If you want your lathe work to be precise and efficient, knowing how to grind lathe tool bits is a skill you can’t afford to ignore. Grinding your own tool bits saves you money, improves the quality of your cuts, and gives you full control over your projects.
You’ll discover simple, step-by-step techniques that anyone can follow—even if you’re new to metalworking. By the end, you’ll feel confident sharpening your tools like a pro and get better results every time you turn the lathe on. Ready to take your skills to the next level?
Let’s dive in.
Credit: www.ebay.com
Choosing The Right Tool Bit
Selecting the right tool bit is important for good lathe work. The tool bit affects the cut quality and tool life.
Different jobs need different tool bits. Knowing which to use saves time and improves results.
Types Of Tool Bits
Tool bits come in many shapes and sizes. Each type fits specific cutting tasks on the lathe.
- Right-hand tool bits cut when moving right to left
- Left-hand tool bits cut when moving left to right
- Diamond-shaped bits are good for finishing cuts
- Round-nose bits create smooth curves
- Parting tool bits cut off pieces from the main work
Choosing the right shape helps control the cut and finish of your workpiece.
Material Considerations
Tool bits are made from different materials. Each material has strengths and weaknesses for cutting.
Common materials include high-speed steel (HSS), carbide, and cobalt. Choose based on the metal you cut.
- High-speed steel is durable and easy to sharpen
- Carbide is very hard and holds edges longer
- Cobalt tools resist heat and wear better than HSS
Match the tool bit material to your lathe work for best performance and tool life.
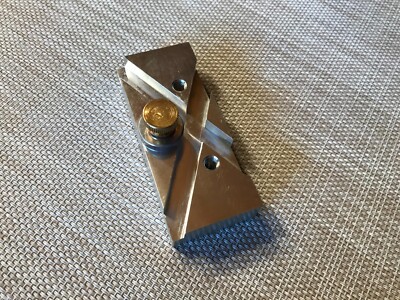
Essential Grinding Equipment
Grinding lathe tool bits needs the right equipment for good results. Using proper tools helps shape the bit correctly and safely.
This guide covers the main equipment you need. It explains how to pick a grinder and the wheels and accessories needed.
Selecting The Grinder
Choose a grinder that runs smoothly and holds the bit steady. A bench grinder is common for tool bit grinding. It should have enough power to shape the metal fast.
- Look for a grinder with a strong motor, at least 1/2 horsepower.
- Check that it has adjustable tool rests for precise angles.
- Choose a model with a clear safety guard.
- Ensure the grinder has good speed control, around 3000 RPM is standard.
- Pick a grinder that is stable and won’t vibrate during use.
Grinding Wheels And Accessories
Grinding wheels come in different materials and sizes. Use the right wheel for the metal in the tool bit. Dressing tools help keep the wheel clean and sharp.
| Wheel Material | Best For | Typical Size |
| Aluminum Oxide | High-speed steel bits | 6″ to 8″ |
| Silicon Carbide | Carbide bits and softer metals | 6″ to 8″ |
| Ceramic | Long-lasting, hard metals | 6″ to 8″ |
Use a wheel dresser to remove clogged material. Safety accessories like eye shields and gloves protect you during grinding.
Preparing For Grinding
Grinding lathe tool bits needs careful preparation. It helps you shape tools accurately and safely.
Good preparation makes the grinding process easier and prevents accidents or damage.
Safety Measures
Safety is very important before you start grinding. You should protect your eyes, hands, and body.
Always wear safety glasses or a face shield to protect against sparks and dust.
- Wear safety glasses or a face shield
- Use gloves to protect your hands
- Wear ear protection to reduce noise
- Keep loose clothes and hair away from the grinder
- Use a dust mask if the area is dusty
Setting Up The Work Area
Set up a clean and well-lit work area. A tidy space helps you work better and safer.
Make sure the grinding machine is stable and near a power source. Clear the area of flammable materials.
- Use a sturdy workbench or stand for the grinder
- Ensure good lighting to see details clearly
- Keep tools and materials organized
- Remove flammable items like paper or cloth
- Have a fire extinguisher nearby just in case
Grinding Techniques
Grinding lathe tool bits is important for cutting metal accurately. It helps shape the tool for better performance.
Good grinding keeps the tool sharp and safe to use. Learning proper techniques improves your work and tool life.
Angle And Profile Setup
Set the right angle on the grinding wheel before starting. The angle controls the cutting edge shape and strength.
Check the tool’s profile to match the workpiece needs. A correct profile helps the tool cut smoothly and last longer.
- Use a tool rest to hold the tool steady.
- Set the side cutting edge angle between 5° and 15°.
- Set the end cutting edge angle around 5° to 10°.
- Shape the tool tip to a sharp point or radius based on use.
Controlling Heat And Avoiding Damage
Grinding creates heat, which can damage the tool bit. Too much heat makes the metal soft and weak.
Use a steady, light touch and cool the tool often. This keeps the tool hard and prevents cracks.
- Dip the tool in water to cool it during grinding.
- Do not press too hard on the grinding wheel.
- Use short grinding passes to reduce heat build-up.
- Check the tool for color changes; blue means too hot.
Step-by-step Grinding Process
Start by cleaning the tool bit to remove dirt and rust. Secure the tool on the rest before grinding.
Grind the front face first, then the side face. Keep checking the angles and shape as you work.
- Hold the tool firmly against the tool rest.
- Turn on the grinder and gently touch the tool to the wheel.
- Grind the front face to create the main cutting edge.
- Grind the side face to form the relief angle.
- Cool the tool in water often to prevent overheating.
- Inspect the tool tip and sharpen if needed.
Sharpening Different Tool Bit Types
Grinding lathe tool bits keeps them sharp and effective. Different tool bits need different sharpening angles and shapes.
Proper sharpening improves cutting quality and tool life. Learn how to grind common tool bit types correctly.
Turning Tool Bits
Turning tool bits cut along the workpiece surface. They need a sharp cutting edge and proper clearance angles.
Grind the front and side relief angles to avoid rubbing. The main cutting edge should be smooth and sharp.
- Front clearance angle: 8 to 12 degrees
- Side clearance angle: 10 to 15 degrees
- Top rake angle: 5 to 15 degrees
- Maintain a sharp, straight cutting edge
Parting Tool Bits
Parting tool bits cut deep grooves or separate parts. They need a thin edge and proper width for strength.
Grind the edge thin but strong. Keep the side clearance angle to reduce friction and avoid tool damage.
- Edge width: 1/16 to 1/8 inch
- Side relief angle: 5 to 8 degrees
- Front rake angle: 0 to 5 degrees
- Keep the edge square and clean
Threading Tool Bits
Threading tool bits create screw threads on the workpiece. They require precise angles to match thread profiles.
Grind the tool to the thread angle, usually 60 degrees for standard threads. Keep the tip sharp and symmetrical.
- Thread angle: 60 degrees (standard)
- Tip radius: very small or zero
- Side relief angles: 5 to 10 degrees
- Ensure both sides are ground evenly

Credit: www.ebay.com
Testing And Adjusting The Edge
Grinding lathe tool bits requires precision and skill. After grinding, testing and adjusting the edge is crucial. This ensures the tool performs well during use.
Let’s explore how to inspect and fine-tune lathe tool bits for optimal performance.
Visual Inspection
Visual inspection is the first step in checking tool bits. Look for any uneven surfaces or rough edges. A well-ground tool bit should have a smooth, shiny surface.
- Check for consistent bevel angles
- Inspect for any chips or cracks
- Ensure the cutting edge is sharp
Trial Cuts And Fine-tuning
After visual inspection, perform trial cuts. Use the tool on a test piece to see how it behaves. This helps identify any adjustments needed.
| Issue | Solution |
| Rough finish | Smoothen the edge further |
| Tool chatter | Adjust the tool angle |
| Poor cutting | Sharpen the cutting edge |
Fine-tuning involves slight adjustments. Make sure the tool is held firmly in the holder. Reassess and repeat as needed for the best results.
Maintenance Tips For Longevity
Keeping lathe tool bits in good condition extends their life. Regular maintenance ensures they work efficiently.
Learn how proper storage and regular regrinding can keep your tools in top shape.
Proper Storage
Storing lathe tool bits properly prevents damage and rust. Keep them dry and organized.
- Use a toolbox with compartments
- Ensure storage area is dry
- Avoid stacking tools to prevent scratches
Regular Regrinding
Regrinding sharpens tools and improves cutting precision. Do it regularly for best results.
| Tool Type | Regrind Frequency |
| High-speed steel | Every 10 hours of use |
| Carbide | Every 20 hours of use |

Credit: www.youtube.com
Frequently Asked Questions
How Do You Sharpen A Lathe Tool Bit?
To sharpen a lathe tool bit, use a bench grinder with proper safety gear. Hold the tool at the correct angle and grind evenly. Cool the tool frequently to avoid overheating, which can damage the metal’s hardness.
What Angle Is Best For Grinding Lathe Tool Bits?
The ideal grinding angle varies by material, but generally, a 60° to 75° angle works well. This angle balances sharpness and strength, ensuring efficient cutting and longer tool life.
Why Is Cooling Important When Grinding Lathe Tools?
Cooling prevents the tool bit from overheating, which can reduce hardness and cause warping. Use water or a coolant to maintain metal integrity and extend the tool’s lifespan.
How Often Should Lathe Tool Bits Be Reground?
Regrind lathe tool bits when they become dull or produce poor surface finishes. Regular inspection helps maintain cutting efficiency and prevents damage to workpieces.
Conclusion
Grinding lathe tool bits takes patience and care. Follow each step slowly and check your progress. Keep the right angle and use steady pressure. A sharp tool bit cuts metal clean and fast. Practice helps you improve your skills over time.
Safety matters—always wear goggles and work carefully. Grinding your own tool bits saves money and time. Try it yourself and see the difference it makes. Simple tools, steady hands, and focus bring good results.