

Are you tired of fumbling through your tools, wishing for a sturdy, reliable place to keep them all within reach? Making a butcher block tool box top could be exactly what you need.
It’s strong, durable, and perfect for organizing your workspace. Imagine having a custom surface that not only protects your tools but also adds a touch of craftsmanship to your shop. In this guide, you’ll discover simple steps to create your own butcher block tool box top—no complicated jargon, just easy-to-follow instructions that anyone can master.
Ready to transform your toolbox into something both practical and impressive? Let’s get started!

Credit: www.reddit.com
Materials Needed
Building a butcher block toolbox top needs some specific materials. Getting the right supplies helps you create a strong and useful piece.
This guide breaks down the materials into three main parts. These are the wood choice, tools, and extra supplies needed.
Choosing The Right Wood
Selecting the proper wood is key to making a durable butcher block top. Hardwoods work best because they resist dents and cuts.
- Maple – strong and light in color
- Oak – tough and has a nice grain
- Walnut – dark color with good hardness
- Cherry – smooth texture and rich tone
Essential Tools
| Tool | Purpose |
|---|---|
| Table Saw | Cut wood pieces to size |
| Router | Shape edges and joints |
| Clamps | Hold wood tightly while gluing |
| Orbital Sander | Smooth the wood surface |
| Drill | Make holes for screws or dowels |
Additional Supplies
You will also need some supplies to complete the project. These help with assembly and finishing the surface.
- Wood glue – for strong joints
- Wood screws – to secure parts
- Sandpaper (various grits) – for final smoothness
- Mineral oil or butcher block conditioner – to protect the wood
- Tape measure and pencil – for measuring and marking
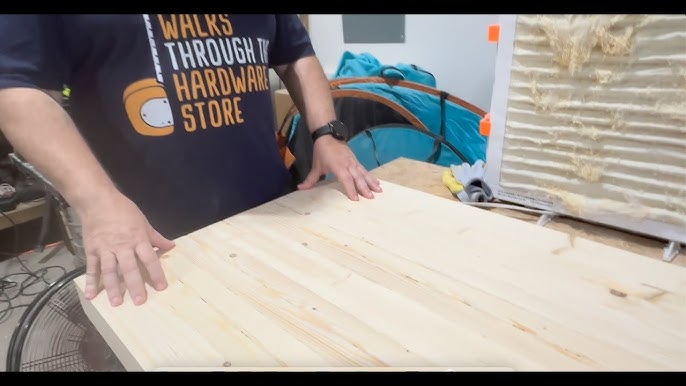
Preparing The Wood
Preparing the wood is the first step in making a butcher block toolbox top. Proper preparation ensures a smooth, strong, and durable surface.
Focus on measuring, cutting, and sanding carefully to get the best result for your project.
Measuring And Marking
Measure your wood pieces accurately before cutting. Use a pencil to mark the lines clearly. Double-check your measurements to avoid mistakes.
- Use a tape measure for precise length
- Mark straight lines with a square tool
- Label each piece to keep track
- Measure twice, cut once
Cutting Techniques
Choose the right saw for your cuts. Keep your cuts straight and smooth. Support the wood well to prevent splintering or damage.
| Tool | Use |
|---|---|
| Table Saw | Straight long cuts |
| Miter Saw | Angled cuts |
| Jigsaw | Curved or detailed cuts |
| Hand Saw | Small cuts or trimming |
Sanding And Smoothing
Sand the wood surface to remove rough edges and prepare it for finishing. Start with coarse grit and move to finer grits for a smooth finish.
- Begin with 80-grit sandpaper
- Use 120-grit for medium smoothing
- Finish with 220-grit for a fine surface
- Sand along the grain to avoid scratches
Assembling The Butcher Block
Making a butcher block toolbox top needs careful assembly. This step joins all wood pieces tightly.
Strong assembly ensures the toolbox top is sturdy and lasts long. Follow each part closely.
Glueing The Pieces
Apply wood glue to the edges of each wood piece. Use enough glue for a strong bond.
Spread the glue evenly with a brush or stick. Avoid using too much glue to prevent mess.
Clamping For Stability
Use clamps to hold the glued pieces together. Clamps keep the wood tight while drying.
Place clamps evenly along the edges. Tighten them enough to close gaps but not damage wood.
- Use bar clamps or pipe clamps
- Check pressure on all pieces
- Leave clamps on for at least one hour
Checking Alignment
Look carefully at the edges to see if they line up well. Misalignment weakens the block.
Use a square tool or ruler to check corners. Adjust clamps if you see any uneven spots.

Credit: www.craftsman.com
Finishing Touches
Adding finishing touches to your butcher block tool box top makes it look great and last longer. This step protects the wood and improves its feel.
Careful finishing also helps keep the tool box top safe from spills and scratches.
Applying Finish Or Sealant
Choose a finish that protects wood and suits your style. Common finishes include oil, wax, or polyurethane.
Apply the finish evenly with a brush or cloth. Work along the wood grain to avoid streaks.
- Use food-safe oil if you plan to work with food on the surface.
- Polyurethane gives strong protection but may feel less natural.
- Wax adds a soft shine and helps repel water.
Drying And Curing Time
Let the finish dry completely before using the tool box top. Drying time depends on the finish type and room conditions.
Some finishes need hours to dry, others take days to cure fully. Avoid touching the surface during this time.
- Oil finishes usually dry in 24 hours but cure in days.
- Polyurethane can take 4 to 6 hours to dry per coat.
- Wax dries quickly but needs reapplying over time.
Adding Handles Or Hardware
Handles make it easier to lift and move the tool box top. Choose hardware that fits your style and is strong enough for use.
Attach handles securely with screws. Mark the spots first and drill pilot holes to prevent wood splitting.
- Use metal or wooden handles for durability.
- Check the handle size for comfort and grip.
- Tighten screws firmly but avoid over-tightening.
Installing The Toolbox Top
Installing a butcher block top on your toolbox can improve your workspace. It adds strength and a flat surface for your tools.
Follow clear steps to attach the top and keep it secure. Proper care will make it last longer.
Attaching To The Toolbox
Start by placing the butcher block top on the toolbox. Make sure it fits well with no gaps around the edges.
Use screws or bolts to fix the top to the toolbox. Drill holes carefully to avoid splitting the wood.
- Align the top evenly on the toolbox
- Mark where you will drill holes
- Pre-drill holes to prevent wood from cracking
- Secure with screws or bolts
- Check that the top does not move
Ensuring Secure Fit
Check all screws or bolts for tightness after installation. Loose hardware makes the top unsafe to use.
Add wood glue between the toolbox and the top for extra hold. Wipe away any glue that squeezes out.
- Inspect fasteners regularly
- Use wood glue for stronger bonding
- Make sure the top sits flat and stable
- Replace damaged screws if needed
Maintenance Tips
Clean the butcher block top regularly with a soft cloth. Avoid harsh chemicals that can damage the wood.
Apply mineral oil or a wood conditioner to keep the surface smooth and protected. This prevents drying and cracking.
- Wipe spills immediately to avoid stains
- Use mineral oil every few months
- Sand lightly if the surface gets rough
- Check for loose screws during maintenance

Credit: www.craftsman.com
Frequently Asked Questions
What Materials Are Needed For A Butcher Block Toolbox Top?
You need butcher block wood, wood glue, clamps, sandpaper, a saw, and finish oil. These materials ensure durability and a smooth finish for your toolbox top.
How Do You Cut Butcher Block For Toolbox Tops?
Measure your toolbox top area accurately. Use a saw to cut the butcher block to the exact size. Smooth edges with sandpaper for a perfect fit.
How To Attach Butcher Block Top To A Toolbox?
Apply wood glue to the toolbox surface. Place the butcher block on top and clamp tightly. Let it dry for 24 hours to secure firmly.
What Finish Is Best For Butcher Block Toolbox Tops?
Use food-safe mineral oil or butcher block oil. These finishes protect the wood and enhance its natural grain without toxic chemicals.
Conclusion
Building a butcher block toolbox top can be simple and fun. Follow each step with care and patience. Use good quality wood for strength and beauty. Sand the surface smooth for a clean finish. Seal it well to protect against water and stains.
This project adds style and function to your workspace. Enjoy the satisfaction of making something useful by hand. Keep your tools organized and easy to reach. Try this project to improve your workshop today.