

Have you ever wanted to create perfect squares quickly in OneNote but didn’t know where to start? Making neat shapes like squares can help organize your notes and make your ideas clearer.
In this guide, you’ll discover a simple trick using the Line Tool that will save you time and make your notes look sharp and professional. Keep reading, and you’ll be able to create squares with ease—no advanced skills needed. Your note-taking just got a whole lot better!
Credit: christophernoessel.medium.com
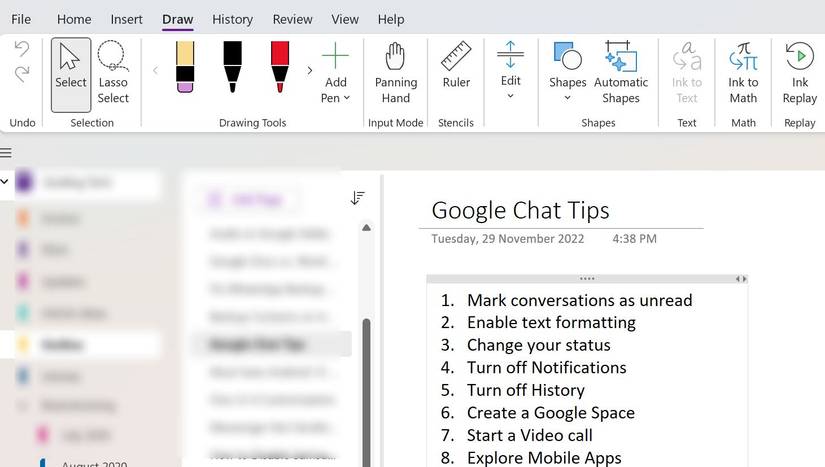
Accessing The Line Tool
The line tool in OneNote helps you draw straight lines easily. You can use it to make squares or other shapes. Finding and using this tool is simple once you know where to look.
Below, you will learn how to locate the drawing tab and select the line tool quickly. This will help you create shapes with precision.
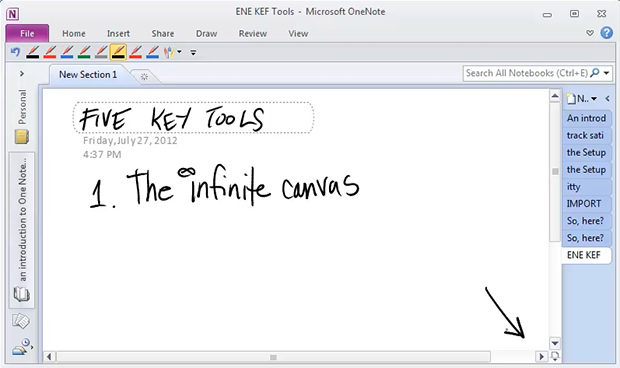
Locating The Drawing Tab
The drawing tab holds all the tools needed for creating shapes and drawings. It is part of the main ribbon at the top of OneNote. You can find it between the Insert and View tabs in most versions of OneNote.
- Open OneNote on your computer.
- Look at the top ribbon menu.
- Find and click the tab labeled “Draw”.
- This opens the drawing tools panel.
Selecting The Line Tool
Once you are in the Draw tab, you can select the line tool to start drawing straight lines. The line tool icon looks like a diagonal line.
| Icon | Function | How to Use |
| Diagonal Line | Draws straight lines | Click icon, then click and drag on the page |
Drawing Straight Lines
Drawing straight lines helps you create neat squares in OneNote. Using the line tool is simple once you know the tricks.
This guide shows how to draw straight lines using your mouse or stylus and how to use the Shift key for perfect results.
Using The Mouse Or Stylus
To draw a straight line with the mouse or stylus, click and hold where you want to start. Drag to the end point and release.
- Click on the line tool in OneNote.
- Place the cursor at the starting point.
- Hold down the left mouse button or press down with the stylus.
- Drag to the desired end point.
- Release to finish the line.
Holding Shift For Perfect Lines
Holding the Shift key while drawing locks the line to horizontal, vertical, or 45-degree angles. This helps keep your squares even and straight.
| Action | Effect |
| Draw line normally | Free angle, may be uneven |
| Hold Shift while drawing | Line snaps to straight angles |
| Release mouse/stylus first | Line stays fixed at snapped angle |
Creating A Square Shape
Making a square with the Line Tool in OneNote is easy. You just draw four equal sides and join them at the corners.
This guide shows how to draw equal lines and align them to form perfect corners for your square.
Drawing Four Equal Sides
Start by drawing a straight line with the Line Tool. Make sure it is the length you want for each side of the square.
Repeat drawing three more lines of the same length. Use the ruler or grid in OneNote to keep all sides equal.
- Select the Line Tool from the Draw menu.
- Draw the first side carefully using the grid for measurement.
- Draw the next three sides with the same length.
- Check each line with the grid to ensure equal size.
Aligning Lines To Form Corners
Position each line so their ends meet at right angles. This creates the four corners of the square.
Use the snap-to-grid or guides in OneNote to help align the lines perfectly.
- Move each line end to meet another line end.
- Adjust the angle to 90 degrees for each corner.
- Use grid snapping to keep corners sharp and accurate.
- Double-check all corners to ensure they are square.
Credit: www.androidpolice.com
Adjusting And Refining The Square
After drawing a square using the line tool in OneNote, you might want to make it look better. Adjusting and refining the square helps you create clean and neat shapes.
This section explains how to use tools to fix mistakes and change the size or position of your square.
Using The Eraser Tool
The eraser tool lets you remove parts of your square if lines are uneven or misplaced. You can erase small sections to fix errors.
Use the eraser carefully to keep the shape intact. It helps clean up your drawing without starting over.
- Select the eraser from the toolbar.
- Click and drag on the line you want to remove.
- Erase only the parts that look wrong.
- Redraw lines if needed after erasing.
Moving And Resizing The Square
You can move the entire square to a better spot on the page. Resizing helps make the square bigger or smaller while keeping its shape.
OneNote lets you select the square and change its size or place easily.
- Click on the square to select it.
- Drag the square to move it to a new position.
- Use the corner handles to resize the square proportionally.
- Drag side handles to adjust width or height separately.
Adding Color And Effects
Adding color and effects makes your squares in OneNote look better. You can change the line color or fill the inside with color. This helps your notes stand out.
Using colors is easy with the Line Tool. You only need a few clicks to add style to your squares. Let’s see how to do it.
Changing Line Color
To change the line color of your square, first select the square you made with the Line Tool. Then find the color option in the toolbar.
Pick any color you like to make the square’s outline brighter or softer. This helps your square look clear on the page.
- Select the square using the Select tool.
- Click the Line Color button in the toolbar.
- Choose a new color from the palette.
- The square’s border changes to the new color.
Applying Fill Colors
OneNote does not fill shapes directly using the Line Tool. To add fill color, you can use the Draw tool or Insert Shapes instead.
If you want to fill your square, draw a shape over your lines and fill it with color. This adds a nice background to your square.
- Go to the Draw tab and choose a highlighter or marker.
- Draw inside the square to add color.
- Or insert a shape with fill color and place it behind the lines.
- Adjust the transparency if needed for a softer look.
Tips For Precision
Creating squares with the line tool in OneNote is simple. Precision makes your squares look neat and professional.
These tips help you draw squares accurately. Use these methods for better results.
Using Gridlines And Rulers
Gridlines and rulers guide your lines. They help in keeping lines straight and even.
Enable gridlines to align your lines perfectly. Use rulers for exact measurements.
- Turn on gridlines in the view menu
- Use rulers to measure sides of your square
- Adjust line length to fit gridlines
Zooming For Detail Work
Zoom in for detailed work. This helps you see small areas clearly.
Zooming improves accuracy when drawing lines. It also helps in adjusting tiny details.
- Zoom in to see each pixel
- Make slight adjustments for precision
- Zoom out to check overall shape
Credit: christophernoessel.medium.com
Frequently Asked Questions
How Do I Draw A Perfect Square Using Onenote’s Line Tool?
To draw a perfect square, hold the Shift key while using the line tool. This constrains the angles to 90 degrees, ensuring equal sides and a precise square shape in OneNote.
Can I Customize The Square’s Size When Using The Line Tool?
Yes, you can customize the size by dragging the line tool’s points. Adjust the length and width manually until you get the desired square dimensions.
Is It Possible To Change The Square’s Color After Drawing?
Absolutely! Select the square, then use the pen or highlighter tool to change its color. OneNote offers multiple color options for customization.
How Do I Ensure All Sides Are Equal When Drawing Squares?
Use the Shift key to lock angles and measure sides carefully. OneNote’s gridlines or rulers can help maintain equal side lengths for perfect squares.
Conclusion
Creating squares with the line tool in OneNote is simple and quick. Just draw four straight lines and connect them carefully. Practice helps you draw neat and even squares every time. This skill can improve your notes and drawings. Keep trying different sizes and angles to see what works best.
Soon, you will feel confident using the line tool for many tasks. Enjoy making clean shapes and organizing your ideas clearly in OneNote.