

Have you ever found yourself stuck trying to remove a circlip but realized you don’t have the right tool? It can be frustrating when a small part like this stops your whole project.
But what if you could get it off quickly, using just things you already have around you? You’ll discover simple, effective ways to remove a circlip without any special tools. Keep reading, and you’ll save time, avoid damage, and get your work done faster than you thought possible.

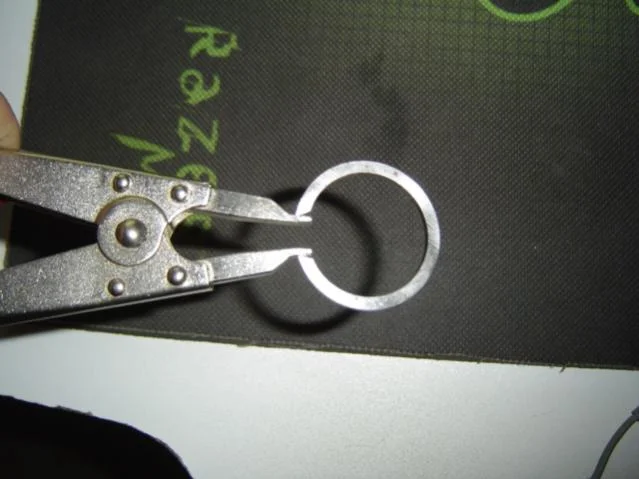
Credit: www.youtube.com
What Is A Circlip
A circlip is a small metal ring used to hold parts in place on a shaft or inside a bore. It fits into a groove and stops parts from moving sideways.
Circlips are common in machines and tools. They keep wheels, gears, and bearings secure during use.
Types Of Circlips
There are two main types of circlips. Internal circlips fit inside a hole. External circlips fit around a shaft.
- Internal circlips secure parts inside a bore.
- External circlips hold parts on a shaft.
Materials Used For Circlips
Circlips are made from strong metals. Common metals include stainless steel and carbon steel. These metals resist wear and rust.
- Stainless steel is rust-resistant and durable.
- Carbon steel is strong but can rust if not coated.
Purpose Of A Circlip
Circlips prevent parts from sliding off shafts or out of holes. They act like a stop or lock in mechanical systems.
They help machines run smoothly by keeping parts correctly positioned. This reduces damage and wear.

Credit: grassrootsmotorsports.com
Common Circlip Removal Challenges
Removing a circlip without the right tool can be tricky. Circlips are small but strong. They hold parts together tightly.
This makes them hard to remove by hand. You need patience and care to avoid damage.
Tight Fit And Small Size
Circlips fit tightly in grooves. Their small size makes them hard to grip. Without tools, it is easy to slip.
Risk Of Injury
Trying to remove a circlip without tools can cause cuts or eye injury. The clip may snap out suddenly.
Damaging The Circlip Or Parts
Using wrong methods can bend or break the circlip. It can also scratch or damage the parts it holds.
- Bending the circlip too much weakens it
- Scratching the groove can cause poor fit later
- Damaged parts may need replacement
Limited Visibility And Access
Circlips often sit in tight or hidden places. This makes it hard to see or reach them without special tools.
| Challenge | Effect | Solution Tip |
| Tight Fit | Hard to grip | Use improvised tools like small flathead screwdriver |
| Small Size | Slips easily | Work slowly and carefully |
| Risk of Injury | Sudden snap-out | Wear safety glasses and gloves |
| Limited Access | Hard to reach | Use thin objects or mirrors for better view |
Safety Tips Before Starting
Removing a circlip without a proper tool needs care. Circlips hold parts tightly. Wrong handling can cause injuries.
Follow safety steps to protect yourself and the work area. Read all tips before you start.
Wear Protective Gear
Always wear safety glasses to protect your eyes. Circlips can snap and fly off quickly. Use gloves to avoid cuts from sharp edges.
Secure The Workpiece
Make sure the item holding the circlip is stable. Use a clamp or a vise to hold it tight. This stops slipping and accidents.
Work In A Clean Area
- Clear your workspace of loose items.
- Keep good lighting so you see clearly.
- Have a container ready to catch the circlip once removed.
Use Proper Hand Tools
Do not use sharp or pointed objects like knives or screwdrivers that may slip. Instead, use small flat tools designed for prying or bending the circlip gently.
Keep your fingers away from the circlip’s path. If it snaps, it can cause injury.
Never rush the job. Take your time to avoid mistakes.
Diy Methods To Remove Circlips
Circlips are small and tricky to remove without tools. But you can use common household items to get the job done. Here are some simple methods to remove circlips safely.
Using A Flathead Screwdriver
A flathead screwdriver can help in removing a circlip. Use the tip to gently pry under the circlip’s edge. Lift it slowly to avoid damage.
- Ensure the screwdriver fits under the circlip.
- Apply even pressure to avoid slipping.
- Be careful to not bend the circlip.
Employing Needle-nose Pliers Substitute
Needle-nose pliers are great for gripping. If unavailable, use tweezers as a substitute. Pinch the circlip and gently pull it away.
- Position the tweezers securely on the circlip.
- Pull steadily and carefully.
- Keep a firm grip to prevent slipping.
Leveraging A Small Knife Blade
A small knife blade can work like a screwdriver. Insert the blade under the circlip and lift it out. Move slowly to avoid cutting yourself.
- Use a non-serrated blade for better control.
- Keep your fingers away from the sharp edge.
- Steady your hand while lifting the circlip.
Using A Paperclip As A Tool
A paperclip can be bent into a useful tool. Straighten it out and form a small hook. Use the hook to snag the circlip and lift it.
- Bend the paperclip carefully to avoid breaking.
- Create a secure hook for gripping.
- Be gentle to prevent bending the circlip.
Twisting With A Pin Or Nail
A pin or nail can twist out a circlip. Insert the tip under the circlip and twist. This action will help lift the circlip out of its groove.
- Choose a pin or nail with a pointed tip.
- Twist slowly to maintain control.
- Ensure the pin or nail does not slip.
Tips For Handling Stubborn Circlips
Removing a circlip without a tool can be tricky. Stubborn circlips need careful handling to avoid damage.
These tips will help you work safely and effectively with circlips that resist removal.
Applying Lubricant
Lubricant reduces friction and makes the circlip easier to move. Use a penetrating oil or light machine oil.
- Apply lubricant around the circlip and inside the groove.
- Let it sit for 5 to 10 minutes to soak in well.
- Gently try to move the circlip with a flat object or your fingers.
- Reapply if the circlip still feels stuck.
Tapping Gently With A Hammer
Tapping can help loosen the circlip by shifting it slightly. Use a small hammer and a soft punch or wooden stick.
| Tool | Purpose |
| Small hammer | To tap gently |
| Wooden stick or punch | To avoid damaging the circlip |
| Flat surface | Support the part holding the circlip |
Tap lightly around the circlip area. Avoid strong hits that may deform the circlip or part.
Heating The Circlip Area
Heat expands metal and can loosen a tight circlip. Use a heat gun or a small torch carefully.
- Heat the area evenly for 1 to 2 minutes.
- Do not overheat to avoid damage or burns.
- Try to remove the circlip immediately after heating.
- Wear gloves to protect your hands from heat.
Preventing Circlip Damage During Removal
Removing a circlip without a tool can be tricky. Protecting the circlip is crucial to avoid damage.
Here are some tips and techniques to ensure safe removal. Follow these steps to keep the circlip intact.
Use A Flathead Screwdriver
A flathead screwdriver can help remove a circlip. Insert it carefully under the circlip’s open end.
Gently twist the screwdriver to lift the circlip. Ensure you do not bend or stretch the circlip.
Use A Pair Of Pliers
Pliers can also assist in removing a circlip. Use pliers with flat and wide jaws for better grip.
Carefully squeeze the circlip’s ends and lift it out. Avoid applying too much pressure to prevent bending.
Apply Lubricant
A lubricant can make circlip removal easier. Apply a small amount around the circlip.
The lubricant reduces friction and helps the circlip slide out smoothly. Ensure you clean any excess after removal.
Use A Piece Of Wire
A sturdy wire can help lift a circlip. Bend the wire into a small hook shape.
Insert the hook under the circlip and gently pull it out. Be careful not to distort the circlip’s shape.
Protect With Cloth
Place a small cloth under the circlip. This protects the surface beneath during removal.
The cloth also provides a soft cushion. It helps prevent any unintended scratches or damage.
Twist And Release
Gently twisting the circlip can release tension. Use a slow twisting motion to loosen it.
Once loosened, you can carefully remove the circlip. This method reduces the risk of breaking.
Check For Rust
Rust can make circlip removal difficult. Inspect the circlip and surrounding area for any rust.
Clean rust with a small brush before removal. This helps ensure a smooth and damage-free process.
When To Use Professional Tools
Removing a circlip without the right tool can be tricky. It may cause damage to the part or injury.
Professional tools make the job safer and faster. They help you avoid mistakes and save effort.
If The Circlip Is Stuck Or Rusted
When a circlip is stuck or rusted, using makeshift tools can break it. Professional pliers are made to grip and twist safely.
Trying to force it with other tools may damage the circlip or the surrounding parts.
Working In Tight Or Small Spaces
Some circlips sit in hard-to-reach areas. Professional tools have thin tips to reach tight spots easily.
Without the right tool, you might slip and hurt yourself or damage parts around the circlip.
When Precision Is Needed
Some machines need precise removal to avoid damage. Professional tools allow controlled and clean circlip removal.
Using random tools can bend or break the circlip, causing machine failure or extra costs.
If You Need To Remove Multiple Circlips
Removing many circlips by hand wastes time and effort. Professional tools speed up the process.
They reduce hand strain and make repeated work easier and safer.

Credit: m.youtube.com
Frequently Asked Questions
How Can I Remove A Circlip Without A Circlip Tool?
You can use small flathead screwdrivers or needle-nose pliers to gently pry the circlip off. Work slowly to avoid damaging the clip or surrounding parts.
What Household Items Can Replace A Circlip Removal Tool?
Items like safety pins, paper clips, or small screwdrivers can help. Carefully insert them into the circlip’s hole and twist to release it.
Is It Safe To Remove Circlips Without The Proper Tool?
Yes, but caution is necessary. Improper removal can damage parts or cause injury. Work slowly and wear safety glasses to protect your eyes.
Can I Reuse A Circlip After Removing It Without A Tool?
Generally, yes. However, check if the circlip is bent or damaged. Replace it if the clip is deformed to ensure a secure fit.
Conclusion
Removing a circlip without a tool can be simple and safe. Use household items like screwdrivers or pliers carefully. Take your time and work slowly to avoid damage. Always protect your eyes and hands during the process. Practice makes the task easier and faster.
With patience and care, you can handle small repairs yourself. Keep these tips in mind for your next project. No special tool? No problem.