

If you own a semi-auto shotgun, knowing how to remove the plug is essential for unlocking its full potential. Maybe you want to increase your shotgun’s capacity or simply need to understand the process for maintenance.
Whatever your reason, this task might seem tricky or even intimidating at first. But don’t worry—by the end of this article, you’ll have clear, simple steps to safely and confidently remove the plug from your semi-auto shotgun. Keep reading to take control of your firearm with ease and precision.
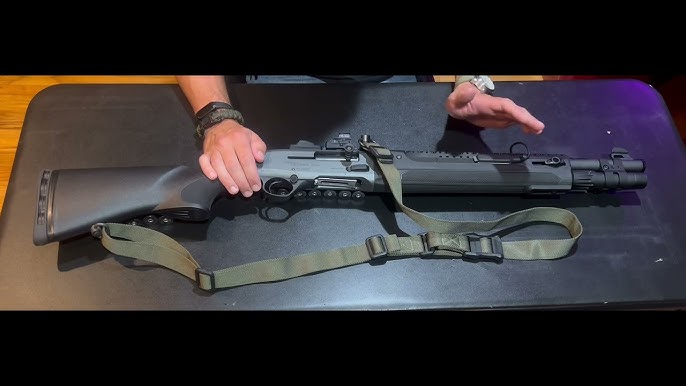
Credit: www.huntingpa.com
Tools Needed
Removing a plug from a semi auto shotgun requires the right tools. Using proper tools makes the process safe and easy.
This guide lists the tools you need before starting the removal. Prepare them to avoid delays or damage.
Screwdrivers
You will need screwdrivers to remove screws holding the plug. A flat-head and a Phillips screwdriver are common choices.
Punch Set
A punch set helps push out pins or plugs carefully without damaging parts. Choose the right size punches for your shotgun model.
Hammer
A small hammer is useful for tapping punches gently. A brass or nylon hammer prevents marks on metal surfaces.
Safety Glasses
Wear safety glasses to protect your eyes from flying debris. This is important when using a hammer and punch.
Cleaning Cloth
A clean cloth helps wipe dirt and oil from the shotgun parts. Keep your work area tidy for better results.
- Flat-head screwdriver
- Phillips screwdriver
- Punch set (various sizes)
- Small brass or nylon hammer
- Safety glasses
- Cleaning cloth
| Tool | Purpose |
| Flat-head screwdriver | Removing flat screws |
| Phillips screwdriver | Removing cross-head screws |
| Punch set | Driving out pins or plugs |
| Small hammer | Tapping punches gently |
| Safety glasses | Protecting eyes |
| Cleaning cloth | Wiping and cleaning parts |
Safety Precautions
Removing the plug from a semi-auto shotgun needs care and attention. Safety is the most important part of this task.
Following safety steps helps prevent accidents and keeps you and others safe.
Unload The Shotgun
Always check that the shotgun is empty before you start. Remove all shells from the magazine and chamber.
Look and feel inside the chamber to make sure no shells remain. This step stops accidental firing.
Keep The Muzzle Pointed In A Safe Direction
Never point the shotgun at anything you do not want to shoot. Keep the muzzle aimed in a safe direction at all times.
This rule reduces the risk of injury if the gun fires by mistake.
Wear Eye And Ear Protection
Use safety glasses to protect your eyes from dirt and debris. Ear protection helps reduce noise damage.
Always wear these safety items when handling or working on your shotgun.
Work In A Well-lit Area
Good lighting helps you see all parts clearly. This reduces mistakes during plug removal.
Choose a clean and organized workspace to keep small parts safe.
Use The Correct Tools
Use tools made for shotgun maintenance. The right tools prevent damage to your gun.
Do not force parts if they do not move easily. Check if you have the correct tool or ask for help.
Follow Manufacturer’s Instructions
Read your shotgun’s manual before removing the plug. Each model may have special steps.
Following the official guide keeps your shotgun safe and in good condition.
Locating The Plug
Removing the plug from a semi-auto shotgun starts with finding the plug inside. This plug limits the number of shells in the magazine tube. Knowing its position helps you remove it safely.
The plug is usually found in the magazine tube under the barrel. It stops you from loading too many shells. Before removal, you need to identify its exact spot.
Check The Magazine Tube
The magazine tube runs parallel to the barrel. It holds the shotgun shells. The plug sits at the front end of this tube, near the muzzle.
Look For The End Cap Or Plug Cover
Many semi-auto shotguns have an end cap covering the plug. This cap can be removed to access the plug. It may have grooves or a flat surface for a tool.
- Locate the magazine tube under the barrel
- Find the end cap or plug cover at the muzzle end
- Check for slots or grooves on the cap
- Use a proper tool for removal
Use A Table To Identify Parts
| Part | Location | Description |
| Magazine Tube | Under the barrel | Holds shotgun shells |
| End Cap | Front of magazine tube | Covers the plug, removable |
| Plug | Inside magazine tube | Limits shell capacity |
Credit: projectupland.com
Disassembling The Shotgun
Removing the plug from a semi auto shotgun needs careful disassembly. You must take apart the shotgun safely and correctly.
This guide shows how to remove the barrel and access the magazine tube. Follow each step slowly and carefully.
Removing The Barrel
Start by ensuring the shotgun is unloaded. Safety is the first priority.
To remove the barrel, you need to unlock the barrel from the receiver. This allows you to take it off easily.
- Point the shotgun in a safe direction.
- Open the action to check there are no shells inside.
- Locate the barrel release or locking mechanism.
- Twist or push the release to unlock the barrel.
- Gently pull the barrel forward and off the receiver.
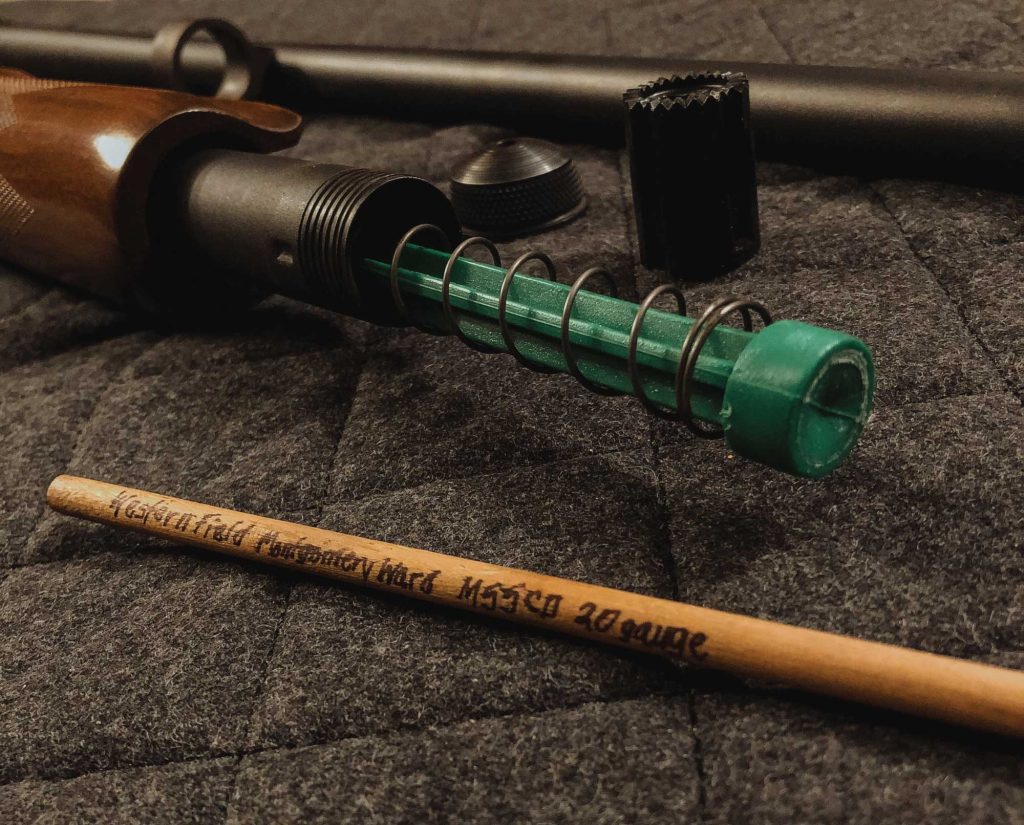
Accessing The Magazine Tube
The plug is inside the magazine tube. To remove it, you must access the tube first.
After removing the barrel, you can reach the magazine tube and take out the plug carefully.
- Find the magazine cap at the end of the tube.
- Use a tool or your hands to unscrew the cap counterclockwise.
- Keep pressure on the spring inside to avoid sudden release.
- Slowly remove the spring and the plug from the tube.
Removing The Plug
Removing the plug from a semi auto shotgun is a simple task. It allows you to increase the shell capacity.
Make sure the shotgun is unloaded before starting. Safety first.
Using Pliers Or Wrench
Use pliers or a wrench to grip the plug firmly. This tool helps to loosen the plug without slipping.
Turn the plug counterclockwise to unscrew it. Keep steady pressure to avoid damaging the threads.
- Hold the shotgun securely
- Grip the plug with pliers or wrench
- Turn slowly to loosen the plug
- Remove the plug carefully
Twisting And Pulling Technique
Sometimes the plug is tight and hard to turn. Try twisting it back and forth gently to loosen it.
After loosening, pull the plug straight out. Do not use force to avoid damage.
- Twist the plug left and right gently
- Once loose, pull the plug straight out
- If stuck, repeat twisting carefully

Credit: www.youtube.com
Reassembling The Shotgun
Reassembling your semi-auto shotgun is a crucial step after maintenance. This ensures the shotgun functions correctly and safely.
Follow these guidelines to put your shotgun back together. Make sure all parts are clean and in good condition.
Align The Barrel
Start by aligning the barrel with the receiver. The barrel should slide easily into the receiver.
Ensure it is seated properly. This step is important for accurate shooting.
Attach The Magazine Tube
Secure the magazine tube to the shotgun. Twist it in place until it is tight.
The tube holds the shells, so make sure it is firm and secure.
Insert The Bolt Assembly
Place the bolt assembly back into the receiver. Slide it gently to avoid damage.
Check that the bolt is moving smoothly. This ensures proper cycling of shells.
Reconnect The Fore-end
Attach the fore-end to the shotgun. It should fit snugly over the magazine tube.
A secure fore-end is essential for proper handling and shooting.
Final Check
Before using the shotgun, perform a final check. Ensure all parts are secure and the shotgun functions smoothly.
This step confirms that the shotgun is ready for safe operation.
Testing The Shotgun
Before using your semi-auto shotgun, testing is essential. It ensures safety and functionality.
This process helps identify any issues with the shotgun. Proper testing leads to better performance.
Initial Safety Checks
Safety checks are the first step in testing. These checks ensure the firearm is safe to handle.
- Ensure the shotgun is unloaded.
- Check for any visible damage.
- Confirm the safety is engaged.
Functionality Testing
Test the functionality of your shotgun. This will ensure all parts work correctly.
Check the action by cycling the bolt. Observe for smooth operation.
Range Testing
Conduct range testing in a safe environment. This confirms performance under real conditions.
| Test Type | Purpose |
| Accuracy | Check aim precision |
| Recoil | Assess handling |
| Reliability | Ensure consistent firing |
Common Issues And Fixes
Removing a plug from a semi-auto shotgun can be tricky. Some common problems may stop you from doing it easily.
Knowing these issues and how to fix them helps you remove the plug safely and quickly.
Stuck Plug
The plug may be stuck inside the barrel due to rust or dirt. This makes it hard to remove by hand.
Clean the barrel and plug area with a solvent. Let it sit for a few minutes to loosen the plug.
- Use a gun cleaning solvent on the barrel
- Apply light tapping with a rubber mallet if needed
- Try using a plug removal tool for better grip
Damaged Threads
The plug may be screwed in tightly with damaged threads. This can cause it to jam inside the barrel.
Check the threads carefully. Use a thread file or tap to repair small damages before trying to remove the plug.
- Inspect threads for damage or dirt
- Clean threads with a brush or cloth
- Use a thread repair tool if threads are damaged
Lack Of Proper Tools
Trying to remove the plug without the right tools can cause damage or make removal impossible.
Use tools made for shotgun plugs, like plug removal wrenches or screwdrivers with the correct size.
- Use a plug removal wrench for better grip
- Do not use excessive force with wrong tools
- Ensure tools fit the plug size exactly
Incorrect Removal Direction
Removing the plug by turning it the wrong way can cause it to tighten more.
Confirm the correct direction to unscrew the plug. Usually, it is counterclockwise, but check your shotgun manual.
- Read the shotgun manual for plug removal instructions
- Turn the plug counterclockwise to loosen
- Stop if you feel resistance and check again
Frequently Asked Questions
How Do You Safely Remove A Plug From A Semi Auto Shotgun?
First, ensure the shotgun is unloaded and pointed in a safe direction. Remove the magazine cap, then carefully unscrew and extract the plug using proper tools. Follow your shotgun’s manual for specific instructions to avoid damage or injury.
What Tools Are Needed To Remove A Shotgun Plug?
Typically, you need a flathead screwdriver or punch, and possibly a wrench. Some models may require specialized tools. Always check your shotgun’s manual to confirm the exact tools needed for safe plug removal.
Can Removing A Plug Affect Shotgun Performance?
Yes, removing the plug increases magazine capacity, which may change the gun’s balance and recoil. Ensure the modification complies with local laws. Always test the shotgun after removal to confirm reliable operation and safety.
Is Removing A Plug From A Semi Auto Shotgun Legal?
Legality varies by location. Some states or countries prohibit removing plugs to increase capacity. Always research and comply with your local firearm laws before modifying your shotgun.
Conclusion
Removing a plug from a semi-auto shotgun is simple with the right steps. Always handle your shotgun safely and carefully. Take your time to avoid damage or injury. Practice these steps until you feel confident. This guide helps you keep your shotgun ready to use.
Stay safe and enjoy your shooting experience.