

Are you struggling to figure out if your auto relay is working properly? Knowing how to test an auto relay can save you time, money, and frustration.
Whether you’re a car enthusiast or just want to keep your vehicle running smoothly, this simple guide will walk you through the steps you need. By the end, you’ll be confident in spotting relay problems before they turn into bigger issues.
Ready to make sure your auto relay is in top shape? Let’s dive in.
Credit: www.oreillyauto.com
Auto Relay Basics
An auto relay is an electrical switch controlled by another circuit. It allows a small current to control a larger current. This is useful in many automotive and electrical applications.
Understanding auto relays can help with troubleshooting and repairs. Knowing how they work is essential for anyone dealing with vehicle electronics.
What Is An Auto Relay
An auto relay is a type of switch. It uses a small current to operate a larger one. This makes it useful for controlling high-power circuits with low-power signals.
| Component | Function |
| Coil | Generates magnetic field |
| Contacts | Open or close circuits |
| Armature | Moves to open or close contacts |
Common Applications
Auto relays are used in many areas of a vehicle. They handle tasks that require switching higher currents than a simple switch can manage.
- Starting systems
- Lighting circuits
- Horn circuits
- Fuel pump operation
Tools Needed For Testing
Testing an auto relay requires specific tools to ensure accurate results. Using the right tools helps find problems fast.
Below are the main tools you need to test auto relays safely and correctly.
Essential Equipment
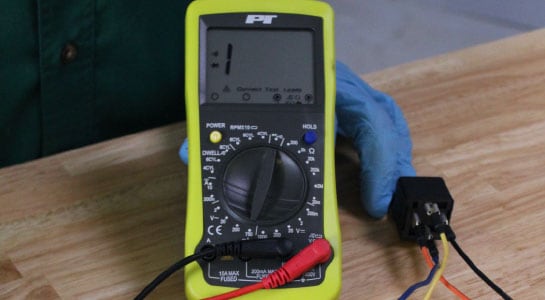
First, you need a multimeter to measure voltage, current, and resistance. It helps check if the relay works well.
A test light is also useful. It shows if power flows through the relay circuit.
- Digital multimeter with voltage and resistance settings
- Test light or circuit tester
- Power supply or battery for relay activation
- Relay socket or jumper wires for connections
- Insulated screwdrivers for safe handling
Safety Gear
Safety gear protects you from electric shocks and injuries. Always wear safety equipment during tests.
Gloves and safety glasses shield your hands and eyes while working with electrical parts.
- Insulated gloves to prevent electric shock
- Safety glasses to protect eyes from sparks
- Non-conductive footwear for extra safety
- Fire-resistant clothing in case of sparks
Preparing For The Test
Testing an auto relay requires careful preparation. This ensures safety and accurate results.
Before testing, follow specific steps to avoid damage or injury. Preparation helps the test go smoothly.
Power Off Procedures
Turn off all power sources before starting the test. This prevents electrical shock and damage.
Disconnect the relay from the circuit to isolate it. Check that no voltage remains on the terminals.
- Switch off the main power supply.
- Use a voltage tester to confirm power is off.
- Disconnect the relay from the control panel.
- Wear safety gloves and equipment.
Visual Inspection
Look at the auto relay carefully before testing. Check for signs of damage or wear.
Inspect the relay housing, terminals, and wiring for cracks, corrosion, or dirt.
- Check for loose or broken connections.
- Look for burnt marks or discoloration.
- Ensure all labels and markings are clear.
- Clean any dust or debris gently.

Credit: www.youtube.com
Step-by-step Testing Process
Testing an auto relay ensures it works safely and correctly. You need to check its coil and contacts. Also, verify its function under power.
This guide shows how to test an auto relay with easy steps. Follow each part carefully for accurate results.
Checking Coil Resistance
Coil resistance shows if the relay coil is good or broken. Use a multimeter set to ohms (Ω) for this test.
- Turn off power to the relay circuit.
- Disconnect the relay coil terminals.
- Place the multimeter probes on the coil terminals.
- Read the resistance value shown on the meter.
- Compare the reading with the relay’s datasheet value.
A very high or infinite resistance means the coil is broken. A very low or zero reading means a short circuit in the coil.
Measuring Contact Resistance
Contact resistance shows how well the relay contacts close. Low resistance means good contact.
| Test Point | Expected Resistance | Notes |
| Normally Open Contacts | Very high (open circuit) | Relay not energized |
| Normally Closed Contacts | Low resistance (close to 0 Ω) | Relay not energized |
| Normally Open Contacts | Low resistance (close to 0 Ω) | Relay energized |
| Normally Closed Contacts | Very high (open circuit) | Relay energized |
Use the multimeter in ohms mode and test across the contacts. Check with relay off and on power.
Functional Test With Power
This test confirms the relay switches properly under voltage. Use a power supply matching the relay coil voltage.
- Connect the relay coil to the power supply.
- Listen for a clicking sound when energized.
- Measure voltage across the coil to confirm power.
- Check the contact resistance to see if it changes.
- Turn off power and check contacts return to original state.
Do not exceed the relay’s voltage rating to avoid damage.
Interpreting Test Results
Testing an auto relay helps check if it works correctly. Reading the test results tells you if the relay is normal or faulty.
Understanding the readings is important to fix problems early and avoid bigger issues.
Normal Vs Faulty Readings
Normal readings show the relay switches on and off as expected. These readings match the relay’s specifications.
Faulty readings show unusual values or no change when the relay is activated. This means the relay may be damaged or worn out.
- Normal readings: consistent voltage or resistance within set limits
- Faulty readings: no change, erratic values, or values outside limits
- Normal relay clicks softly when tested
- Faulty relay may not click or click weakly
Common Issues And Causes
Auto relays can fail due to dirt, corrosion, or electrical problems. These issues stop the relay from working right.
Mechanical wear and loose connections also cause poor test results. Checking these helps find the root problem.
- Dirt or dust inside the relay blocks contacts
- Corrosion on terminals causes bad connections
- Worn parts stop the relay from switching correctly
- Loose wiring leads to unstable readings
- Overheating damages relay coils and contacts

Credit: www.oreillyauto.com
Troubleshooting Tips
Testing an auto relay is essential for ensuring proper car function. Faulty relays can cause various issues in your vehicle’s electrical system.
This guide will help you identify and fix common relay problems using simple troubleshooting methods.
Dealing With Coil Failures
Coil failures in relays can prevent the relay from activating. This may lead to non-functional circuits within your car.
| Problem | Solution |
| No sound when relay is activated | Check coil resistance with a multimeter |
| Coil resistance too high | Replace the relay |
| Burnt coil smell | Inspect for visible damage and replace |
Fixing Contact Problems
Contact problems can disrupt the flow of electricity, leading to intermittent or no power delivery to components.
- Ensure relay terminals are clean and free of corrosion.
- Inspect for loose connections and secure them.
- Test contact continuity using a multimeter.
- Replace the relay if contacts are damaged or pitted.
Maintenance For Longevity
Auto relays help control electrical circuits automatically. Keeping them in good shape ensures they work longer.
Regular maintenance reduces breakdowns and saves money on repairs. Simple care steps keep relays reliable.
Regular Cleaning
Dirt and dust can block relay contacts and cause failures. Clean your auto relay often to avoid issues.
Use a soft brush or compressed air to remove grime. Avoid using water or harsh chemicals on electrical parts.
- Turn off power before cleaning
- Brush away dust gently
- Use compressed air for hard-to-reach spots
- Check for corrosion or damage
- Keep the relay dry and free of debris
Periodic Testing Schedule
Testing relays regularly helps find problems early. Set a testing routine based on usage and environment.
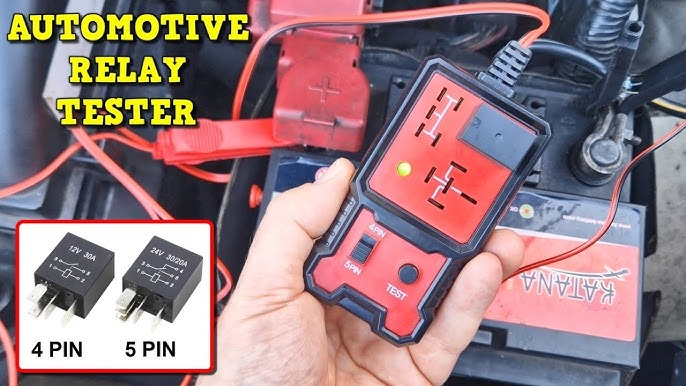
Test the relay contacts, coil resistance, and switching operation. Use a multimeter or relay tester for accuracy.
- Test monthly in harsh environments
- Test every three months in normal conditions
- Check coil resistance against specs
- Confirm contacts open and close properly
- Replace faulty relays immediately
Frequently Asked Questions
What Tools Are Needed To Test An Auto Relay?
To test an auto relay, you need a multimeter, test light, and wiring diagram. These tools help check continuity, voltage, and relay operation accurately.
How Do You Check If An Auto Relay Is Working?
Check the relay by applying voltage to its coil terminals. Listen for a click and test continuity between switch terminals to confirm functionality.
What Common Issues Indicate A Faulty Auto Relay?
Common signs include engine not starting, electrical components failing, or relay clicking without activating circuits. These suggest relay replacement may be necessary.
Can You Test An Auto Relay Without Removing It?
Yes, you can test some relays in place using a multimeter and observing voltage changes. However, removal often provides more accurate testing results.
Conclusion
Testing an auto relay helps keep electrical systems safe and working. Always check the relay’s connections and operation carefully. Use simple tools like a multimeter to measure voltage and resistance. Testing regularly can spot problems before they cause damage. Remember, a well-tested relay means reliable performance and less risk.
Take your time and follow clear steps for best results. This small effort can save you from big troubles later. Keep your auto relay in good shape for smooth, safe operation.