

If you’re planning to work with PEX plumbing, knowing how to use a PEX crimp tool is a must. This simple device can save you time and prevent leaks, but only if you use it correctly.
Imagine finishing your project with secure, watertight connections that last for years. You’ll learn clear, step-by-step instructions to master your PEX crimp tool quickly. Whether you’re a beginner or just need a quick refresher, this guide will help you get the job done right the first time.
Keep reading to discover the easy tricks that make your plumbing work smooth and reliable.

Credit: www.sharkbite.com
Pex Crimp Tool Basics
Understanding the basics of a Pex crimp tool is key for plumbing projects. It helps create strong, leak-free connections in Pex piping. This section covers the core information you need to get started. Learn what the tool is, the types available, and the accessories needed for best results.
What Is A Pex Crimp Tool
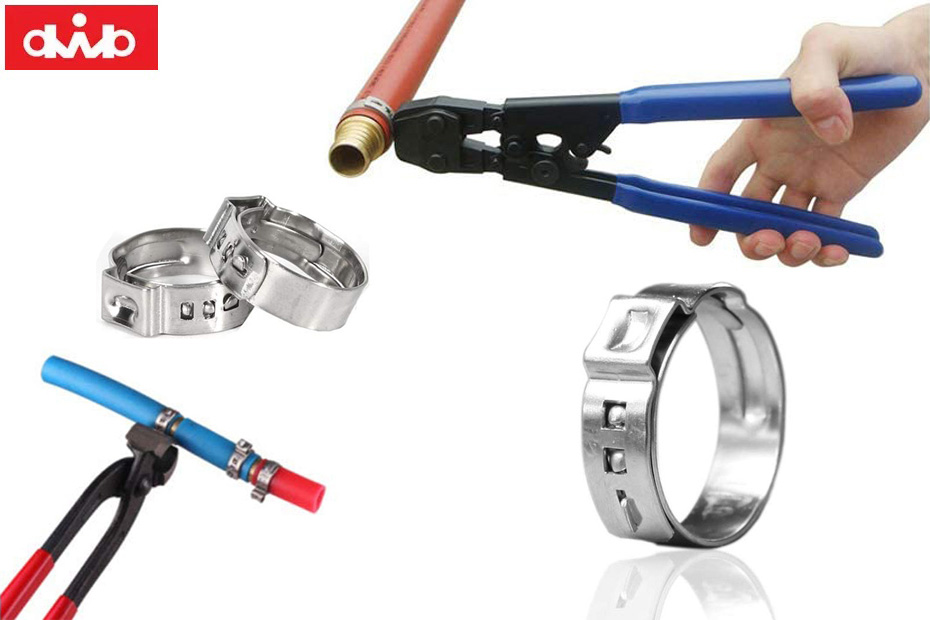
A Pex crimp tool is a hand tool. It crimps copper rings around Pex tubing. This action secures fittings tightly. The tool applies pressure to create a permanent seal. It ensures water flows without leaks. Using this tool is faster than soldering pipes.
Types Of Pex Crimp Tools
There are manual and ratchet Pex crimp tools. Manual tools require hand strength to crimp. Ratchet tools offer more control and consistent crimps. Some tools come with interchangeable jaws. They fit different ring sizes. Choose a tool based on your project size and skill level.
Essential Accessories
Besides the crimp tool, you need copper crimp rings. These rings come in different sizes to match pipe diameters. A Pex pipe cutter is important for clean cuts. A crimp gauge checks if crimps are tight enough. These accessories help ensure a secure and reliable plumbing job.
Preparing For Crimping
Preparing for crimping ensures a strong and leak-free connection. This step involves choosing the right materials and making clean cuts. Proper preparation saves time and avoids problems later.
Selecting The Right Pex Tubing
Use PEX tubing designed for your plumbing needs. Check the size and type carefully. Different sizes fit different fittings. Ensure the tubing matches your project requirements.
Choosing Compatible Fittings
Select fittings that work with your PEX tubing. Use fittings made for crimp connections. Confirm the size matches the tubing diameter. Using the wrong fitting leads to leaks.
Cutting Pex Tubing Accurately
Cut the tubing straight and clean. Use a sharp PEX tubing cutter. Avoid jagged or angled cuts. Straight cuts create a better seal with fittings.
Step-by-step Crimping Process
The step-by-step crimping process is simple and clear. It ensures a strong, leak-free connection in your PEX plumbing. Follow each step carefully for the best results. This guide helps you understand how to use a PEX crimp tool effectively.
Positioning The Crimp Ring
Start by sliding the crimp ring over the PEX pipe. Move it about 1/4 inch from the pipe’s end. This space allows the fitting to fit inside the pipe correctly. Make sure the ring sits evenly around the pipe. Uneven placement can cause leaks or weak connections.
Inserting The Fitting
Push the fitting firmly into the pipe until it stops. The fitting should fit snugly inside the pipe. Check that the pipe covers the fitting’s barbs completely. This ensures a tight seal. Hold the fitting steady while positioning the crimp ring.
Using The Crimp Tool Correctly
Open the crimp tool and place its jaws over the crimp ring. Center the tool evenly on the ring. Squeeze the handles firmly until the tool clicks or locks. This click means the ring is fully compressed. Avoid squeezing lightly or unevenly to prevent leaks.
Checking The Crimp
Inspect the crimp ring after using the tool. The ring should be evenly compressed all around. Use a Go/No-Go gauge to check the crimp size. The ring must fit inside the gauge without gaps. A proper crimp ensures a secure and lasting connection.
Common Mistakes To Avoid
Using a PEX crimp tool correctly ensures strong and leak-free connections. Avoiding common mistakes saves time and prevents damage. These errors often cause leaks or weak joints. Learn what to watch out for to get the best results.
Incorrect Ring Placement
Placing the crimp ring too far from the fitting is a common error. The ring must sit just behind the fitting’s edge. Too far away, and the connection will leak. Too close, and it may damage the pipe. Check the ring position before crimping.
Improper Tool Use
Using the wrong size or type of crimp tool causes poor crimps. Ensure your tool matches the ring size and pipe diameter. Squeezing the handles unevenly leads to incomplete crimps. Keep the tool clean and well-maintained for smooth operation.
Overtightening And Undertightening
Too much pressure can crush the pipe or damage the ring. Too little pressure causes loose connections that leak. Apply steady, firm pressure until the tool clicks or indicates completion. Practice on scrap pieces to learn the right force.
Maintenance And Safety Tips
Proper care of your Pex crimp tool keeps it working well and safe to use. Maintenance helps avoid problems during plumbing tasks. Safety tips protect you and others around.
Cleaning The Tool
Wipe the tool after each use to remove dirt and debris. Use a dry cloth or a soft brush for cleaning. Avoid water to stop rust and damage. Check the jaws for any stuck material and clear it carefully.
Storing Properly
Store the crimp tool in a dry, cool place to prevent rust. Keep it in a toolbox or a protective case. Avoid leaving it on the ground or in damp areas. Secure the handles closed to protect the jaws.
Safety Precautions During Use
Always wear safety glasses to protect your eyes from flying bits. Check the tool for damage before starting work. Use the right size crimp rings to avoid mistakes. Keep fingers away from the jaws while crimping. Work on stable surfaces to keep control of the tool.

Credit: www.walmart.com
Troubleshooting Crimping Issues
Troubleshooting crimping issues is key for a strong PEX connection. Problems can cause leaks or weak joints. Knowing how to spot and fix these issues saves time and money. Follow simple steps to ensure your crimp tool works right every time.
Leaks And How To Fix Them
Leaks often happen from loose or uneven crimps. Check the ring for a full, even crush around the pipe. Use a go/no-go gauge to test the crimp size. Replace any ring that looks damaged or under-crimped. Re-crimp with care, making sure the tool fits snugly on the ring.
Tool Calibration Tips
Calibration keeps your tool accurate. Test the tool with a calibration ring regularly. Adjust the crimp tool screw if crimps are too tight or too loose. Follow the tool manual for exact steps. Proper calibration prevents leaks and extends tool life.
When To Replace Parts
Parts wear out with use. Replace jaws if they show cracks or wear marks. Springs and handles should move smoothly; replace if stiff or broken. Use original parts for best results. Regular checks keep your tool working perfectly.

Credit: www.youtube.com
Frequently Asked Questions
What Is A Pex Crimp Tool Used For?
A Pex crimp tool secures Pex tubing connections with metal rings. It ensures leak-proof joints in plumbing systems. The tool compresses the ring tightly around the tubing and fitting. Proper use prevents water damage and maintains system integrity.
How Do You Properly Use A Pex Crimp Tool?
First, slide the crimp ring onto the Pex tubing. Insert the tubing onto the fitting fully. Position the crimp tool over the ring evenly. Squeeze the handles firmly to compress the ring. Check the connection with a gauge for tightness.
Can A Pex Crimp Tool Be Used Multiple Times?
Yes, a Pex crimp tool can be reused multiple times. However, inspect it regularly for wear or damage. Worn jaws may cause improper crimps and leaks. Always maintain and store the tool properly for longevity.
How Do You Know If A Pex Crimp Is Secure?
Use a Pex crimp gauge to test the ring. The gauge measures ring compression for a proper seal. A secure crimp will fit snugly without gaps. Visual inspection also helps to spot uneven crimps or damage.
Conclusion
Using a Pex crimp tool is simple with practice and care. Always check your connections to avoid leaks. Choose the right size crimp ring for your pipes. Keep your tool clean and well maintained. Safety matters—wear gloves and goggles while working.
With these steps, your plumbing projects will be strong and secure. Take your time and follow each step carefully. This tool helps make plumbing repairs easier and faster. Trust your skills and the right tools for success.