


Are you tired of struggling with loose wires and unreliable connections? Understanding what a crimping tool is can change the way you handle your electrical or DIY projects.
This simple device is the secret to creating strong, secure joins quickly and easily. By the end of this article, you’ll know exactly how a crimping tool works, why it’s essential, and how it can save you time and frustration.
Ready to make your connections stronger and your work neater? Let’s dive in!
Crimping Tool Basics
A crimping tool is a simple device. It helps join two pieces of metal or wire. It works by pressing them tightly together. This creates a strong connection without soldering. Understanding the basics of crimping tools is useful for many tasks.
These tools are common in electrical work and crafts. They ensure secure and reliable connections. Knowing how they work helps you pick the right tool. It also improves the quality of your projects.
Purpose And Function
The main purpose of a crimping tool is to connect wires or cables. It presses a connector onto the wire’s end. This creates a firm, electrical, or mechanical bond. The tool applies pressure evenly to avoid damage. It replaces the need for twisting or soldering wires.
Crimping tools provide fast and consistent results. They help prevent loose connections that cause failures. Many electricians and hobbyists rely on them daily. The tool is easy to use and saves time.
Common Types
Several types of crimping tools exist. Each suits different connectors and wires. The most common type is the hand crimper. It works well for small wires and terminals. Ratcheting crimpers provide more force and control. They lock in place until the crimp is complete.
There are also specialized crimpers for coaxial cables and RJ45 connectors. These tools have specific shapes to fit unique connectors. Choosing the right type depends on your project needs. Using the correct tool ensures a strong and lasting connection.

Credit: en.wikipedia.org
Key Components
The key components of a crimping tool determine how well it works. Each part plays a special role in making strong and secure connections. Understanding these components helps you use the tool better and choose the right one for your needs.
Jaw And Die
The jaw is the part that holds the connector and wire. It presses them together tightly. The die is a shaped piece inside the jaw. It fits different connector sizes and shapes. Together, they ensure a strong, reliable crimp every time.
Handle Design
Handles give you the grip and force needed to crimp. They are often made with soft materials for comfort. Some handles are long for extra leverage. Good handle design reduces hand fatigue and improves control during use.
Ratchet Mechanism
The ratchet mechanism controls the crimping action. It locks the tool until the crimp is complete. This ensures consistent pressure and a secure connection. It also prevents partial crimps that can cause failures later.
Choosing The Right Tool
Choosing the right crimping tool is key for a smooth and strong connection. The tool must match your specific needs. This helps avoid damage and ensures a reliable link. Consider the type of materials, connectors, and how often you will carry it.
Material Compatibility
Crimping tools work with different materials. Some fit copper wires, others suit aluminum or coaxial cables. Using the right tool for your wire type prevents poor connections. Check the tool’s specifications before buying.
Connector Types
Connectors vary widely. Some tools fit RJ45 plugs for network cables. Others work with insulated terminals or coaxial connectors. Choose a tool that matches the connectors you use most. This saves time and keeps connections secure.
Size And Portability
Size matters if you work in tight spaces or travel often. Compact tools are easy to carry and store. Larger tools might offer more power but can be bulky. Pick a size that fits your workspace and job style.
Step-by-step Crimping Process
The step-by-step crimping process shows how to use a crimping tool correctly. This process joins cables and connectors firmly. Follow each step carefully for strong, reliable connections.
Preparing The Cable
First, strip the cable’s outer jacket. Remove about half an inch of insulation. Be careful not to cut the wires inside. Separate and straighten the wires for easy handling.
Inserting The Connector
Next, place the connector onto the cable end. Make sure the wires fit inside the connector slots. Push the connector fully onto the cable. The wires must reach the connector’s metal pins.
Applying The Crimp
Place the connector in the crimping tool’s jaws. Squeeze the handles firmly and slowly. The tool presses the connector onto the wires. This creates a tight, secure bond between them.
Inspecting The Result
Check the crimped connection for any loose wires. The connector should not move or slide off. Look for evenly pressed metal parts. A good crimp ensures strong electrical contact and durability.
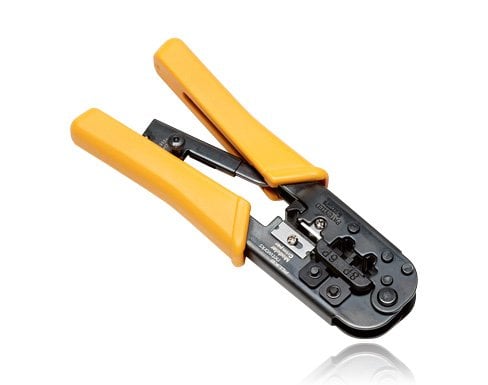
Common Applications
Crimping tools are handy devices used to join two pieces of metal or wire by deforming one or both. They create secure, lasting connections without soldering or twisting. These tools find use in many fields, making work easier and safer.
Electrical Wiring
Electricians use crimping tools to connect wires quickly. They attach terminals and connectors to wires. This ensures a strong electrical connection and prevents wires from coming loose. Crimping tools help save time and improve safety in homes and buildings.
Networking Cables
In networking, crimping tools attach connectors to cables. This includes Ethernet cables for internet and data transfer. Proper crimping ensures fast and stable network connections. It also helps avoid connection drops and signal loss.
Automotive Repairs
Mechanics use crimping tools in car repairs. They connect wires in vehicles’ electrical systems. Crimped connections handle vibrations and heat well. This keeps vehicle electronics working reliably and safely on the road.
Credit: www.flukenetworks.com
Maintenance Tips
Proper maintenance of a crimping tool keeps it working well and lasts longer. Small efforts in care prevent damage and ensure smooth operation. Here are key tips to maintain your crimping tool.
Cleaning The Tool
Clean the tool after every use. Remove dirt and dust with a dry cloth. Use a small brush to clear debris from tight spots. Avoid water or harsh chemicals that may cause rust. Keep the jaws free from grease or oil for a good grip.
Storage Recommendations
Store the tool in a dry place to avoid moisture damage. Use a protective case or pouch to prevent scratches. Keep it away from heavy objects that may bend or break parts. Organize tools so you can find the crimper quickly and keep it safe.
When To Replace
Replace the tool if jaws become worn or damaged. Notice if crimps no longer hold wires tightly. Check for loose or broken handles that affect control. A worn tool can cause poor connections and waste time.

Credit: autoedu.info
Frequently Asked Questions
What Is The Primary Use Of A Crimping Tool?
A crimping tool securely joins wires to connectors by compressing them. It ensures strong electrical connections and prevents wire slippage, commonly used in networking and electrical work.
How Does A Crimping Tool Work?
A crimping tool works by applying pressure to a connector and wire, deforming the connector to grip the wire tightly. This creates a reliable mechanical and electrical connection without soldering.
What Types Of Connectors Can Crimping Tools Handle?
Crimping tools handle various connectors like RJ45, RJ11, coaxial, and insulated terminals. Different tools or interchangeable dies are often needed for specific connector types.
Why Is Using A Crimping Tool Important In Wiring?
Using a crimping tool ensures secure, consistent, and durable connections. It prevents loose wires, reduces signal loss, and improves overall electrical safety and performance.
Conclusion
A crimping tool helps join wires and connectors securely. It works by pressing parts tightly together. This tool is simple but very useful in electronics and wiring tasks. Anyone working with cables will find it helpful. Choosing the right crimping tool makes jobs easier and safer.
Practice using it to get better results. Understanding this tool adds value to your skills and projects. Give it a try and see the difference it makes.