

When using a crimping tool, you want every connection to be strong and secure. Imagine spending hours on a project, only to find loose wires or poor connections that cause frustration and delays.
You don’t have to worry about that. By using the right technique and paying attention to key details, you can make sure your crimps hold tight every time. Keep reading to discover simple tips that will save you time, improve your work, and make your projects hassle-free.
Your next perfect crimp is just a few steps away.
Choosing The Right Crimping Tool
Choosing the right crimping tool is important for a strong connection. The right tool helps make secure and safe joints. It also saves time and effort during work. Understanding different crimping tools and their uses helps pick the best one.
Types Of Crimping Tools
Crimping tools come in many shapes and sizes. Some are for small wires, others for large cables. Manual crimpers work by hand and are good for light jobs. Hydraulic crimpers use pressure and fit heavy-duty cables. Ratchet crimpers lock in place to ensure even pressure. Knowing these types helps select the best tool for each task.
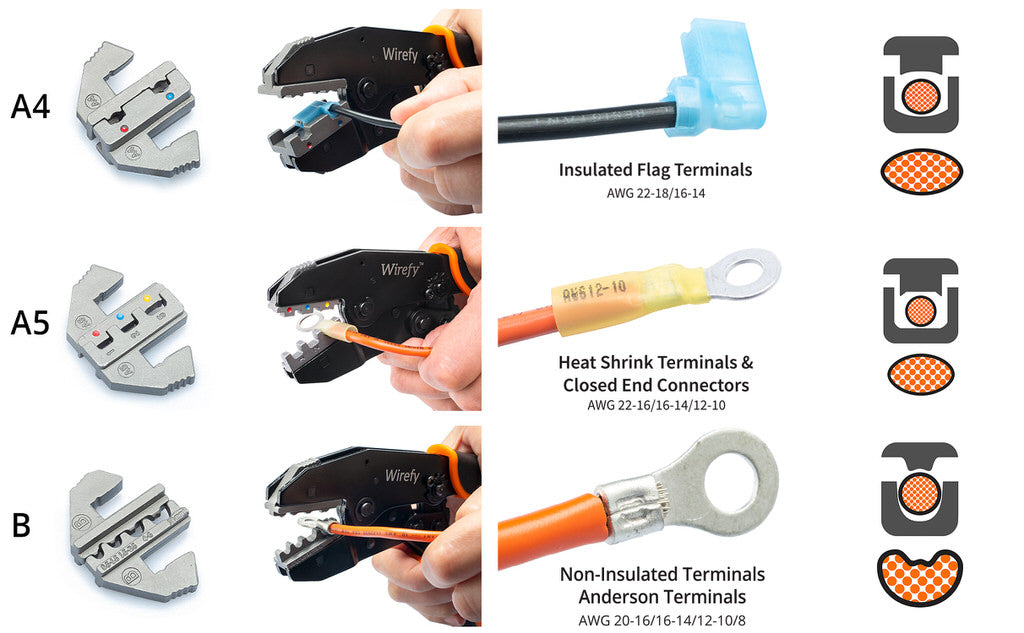
Matching Tools To Connectors
Each connector needs a specific crimping tool. Using the wrong tool can damage the connector or wire. Check the connector size and type first. Then choose a tool that matches those details. This match ensures a tight crimp and safe electrical contact. Always follow the connector maker’s recommendations for best results.
Credit: artbeads.com
Preparing Your Workspace
Preparing your workspace is the first step before using a crimping tool. A tidy and well-lit area helps you work safely and efficiently. It reduces mistakes and saves time. Taking a few moments to set up properly makes a big difference in your project’s success.
Organizing Tools And Materials
Gather all tools and materials needed for the job. Place the crimping tool, wires, connectors, and wire strippers close together. Keep everything within reach to avoid interruptions. Use small containers to sort connectors and screws. This keeps your workspace neat and stops parts from getting lost.
Ensuring Proper Lighting
Good lighting helps you see small parts clearly. Use a bright lamp or natural light near your workspace. Avoid shadows that can hide details. Proper light reduces eye strain and improves accuracy. Check your workspace light before starting to work with the crimping tool.
Personal Protective Equipment
Personal protective equipment (PPE) is vital when using a crimping tool. It keeps you safe from injuries and accidents. Using the right gear reduces risks and helps you work with confidence.
Wearing Safety Glasses
Safety glasses protect your eyes from flying debris and wire pieces. Crimping tools can cause small metal bits to shoot out unexpectedly. Glasses with side shields offer extra protection. Always wear them to avoid eye injuries.
Using Gloves For Hand Protection
Gloves protect your hands from cuts, pinches, and abrasions. They provide a better grip on the tool and wires. Choose gloves that fit well and allow good movement. Avoid loose gloves that might get caught in the tool.
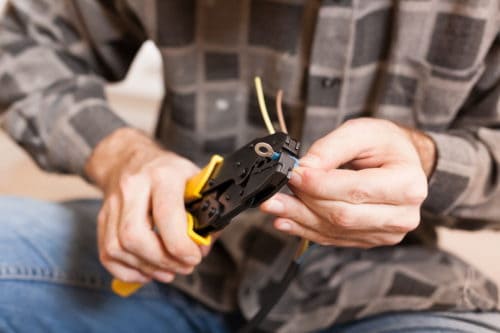
Safe Handling Techniques
Using a crimping tool safely protects your hands and ensures good results. Handling the tool with care reduces risks and keeps work smooth. Follow simple techniques to avoid injuries and improve your work quality.
Focus on how you hold the tool and where you place your fingers. Small changes in grip and pressure can make a big difference. Stay alert to avoid common hazards like pinch points.
Correct Grip And Pressure
Hold the crimping tool firmly but not too tight. A strong grip helps control the tool well. Avoid squeezing it hard; too much force can damage the tool or wires. Use steady pressure to create clean crimps. Practice the right grip to work longer without hand fatigue.
Avoiding Pinch Points
Pinch points are places where fingers can get caught. Keep your fingers away from the tool’s moving parts. Always check the tool before use to see where pinch points are. Use protective gloves if needed for extra safety. Stay focused and never rush your work to avoid accidents.
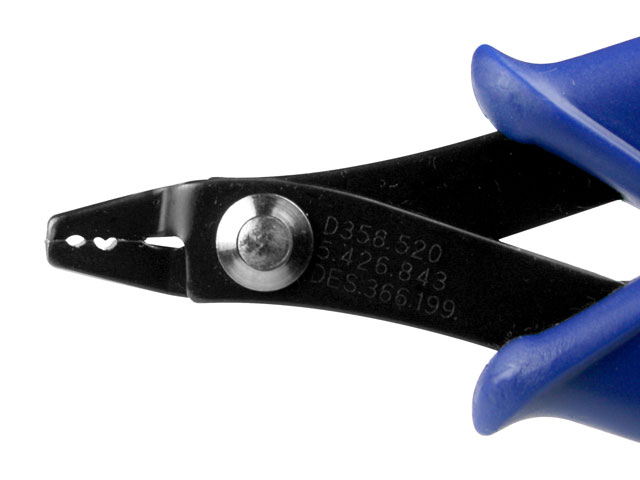
Inspecting Tools Before Use
Inspecting your crimping tool before use is a simple step that saves time and ensures safety. A quick check helps avoid poor connections and tool damage. It also keeps your work smooth and efficient.
Checking For Damage
Look closely at the tool for cracks or bends. Check the handles for any looseness or breaks. Make sure the jaws align correctly and close tightly. Damaged tools can cause weak crimps or break during use. Replace or repair tools if you find any issues.
Maintaining Tool Cleanliness
Keep the tool free from dirt, dust, and grease. Use a clean cloth to wipe the jaws and handles. Dirty tools can slip or damage wires. Clean tools help make precise and reliable crimps. Regular cleaning extends the tool’s life and performance.
Proper Crimping Procedure
Using a crimping tool correctly is important for strong, reliable connections. Following the proper crimping procedure helps avoid loose wires and faulty circuits. Each step in the process matters to ensure a good fit and secure hold.
Aligning Connectors And Wires
Start by placing the wire and connector properly. The wire’s stripped end must fit fully inside the connector. Check that no wire strands stick out. Position the connector in the crimping tool’s correct slot. Proper alignment ensures the tool crimps evenly and firmly.
Applying Consistent Pressure
Squeeze the crimping tool handles evenly and steadily. Avoid quick, jerky movements that can weaken the crimp. Hold the pressure for a few seconds to secure the connection. Release slowly to prevent damage. Consistent force creates a tight, lasting bond between wire and connector.
After Crimping Safety Steps
After using a crimping tool, safety does not stop at finishing the job. Taking the right steps after crimping ensures your work stays secure and your tools last longer. These steps help avoid problems and keep your workspace safe.
Testing Connections
Always test each crimped connection before use. A simple pull test checks if the wire stays firmly in place. Use a multimeter to check electrical connections for continuity and resistance. Testing prevents loose connections that can cause failures or hazards. It also helps catch mistakes early for quick fixes.
Storing Tools Safely
Clean your crimping tool after use to remove dirt and debris. Store it in a dry place to avoid rust and damage. Use a tool case or holder to keep it organized and protected. Proper storage extends the tool’s life and keeps it ready for the next job. Avoid leaving tools out where they can cause accidents.
Credit: www.conwire.com
Avoiding Common Mistakes
Using a crimping tool needs care to get good results. Mistakes can cause weak connections or damage. Avoiding these errors helps make strong and safe joins every time.
Overcrimping Risks
Crimping too hard can break the wire or connector. It makes the metal thin and weak. This causes poor electrical flow and can lead to failure. Use just enough pressure to hold parts tight. Check the crimp after pressing to see if it is firm but not crushed.
Using Incorrect Connectors
Each wire size needs a matching connector. Using the wrong type can cause loose or bad contacts. This leads to sparks or heat build-up. Always match connectors to wire gauge. Look at the color code or size label before crimping. Correct connectors make the job safer and longer-lasting.

Credit: www.wikihow.com
Frequently Asked Questions
What Safety Precautions Are Essential When Using A Crimping Tool?
Always wear safety glasses and gloves to protect your eyes and hands. Check the tool for damage before use. Work in a well-lit area to avoid mistakes. Follow the manufacturer’s instructions carefully to prevent accidents and ensure proper crimping.
How Do You Choose The Right Crimping Tool Size?
Select a crimping tool that matches the connector size and wire gauge. Using the correct size ensures a secure connection. Check the tool’s specifications for compatibility. Using the wrong size can damage connectors or cause poor connections.
What Is The Best Technique For Effective Crimping?
Strip wires to the correct length, insert fully into the connector, and align properly. Apply firm, even pressure with the crimping tool. Avoid twisting or bending wires during crimping. This technique ensures a strong, reliable electrical connection.
How Often Should Crimping Tools Be Maintained Or Replaced?
Inspect your crimping tool regularly for wear or damage. Clean and lubricate moving parts to maintain smooth operation. Replace the tool if it no longer crimps securely or shows signs of rust. Proper maintenance extends tool life and ensures consistent results.
Conclusion
Using a crimping tool correctly saves time and ensures strong connections. Always choose the right tool for your task. Keep your tool clean and check it often for damage. Practice steady pressure to avoid weak crimps. Good crimps help prevent electrical problems later.
Safety matters—wear gloves and work carefully. Small efforts lead to better results every time. Trust your tool and skills to get the job done well. Simple steps make your work safer and more reliable.