


Are your tools scattered everywhere, making it hard to find what you need when you need it? Organizing your pegboard tools can transform your workspace into a neat, efficient zone where every tool has its place.
Imagine grabbing the right tool instantly, saving time and cutting down frustration. You’ll discover simple, practical steps to organize your pegboard tools so your projects flow smoothly and your workspace looks great. Ready to take control of your tools and boost your productivity?
Let’s get started!
Benefits Of Pegboard Tool Organization
Organizing tools on a pegboard offers many benefits for your workspace. It helps keep tools neat and easy to find. A well-arranged pegboard makes your work faster and less stressful. Tools stay safe and last longer with proper storage. These benefits improve your overall work experience and save time.
Maximizing Workspace Efficiency
Pegboards use vertical space, freeing up your workbench. More space means less clutter and better focus. Tools hang within reach, so no need to dig through drawers. This setup speeds up your tasks and keeps your area tidy.
Easy Access And Visibility
Tools on a pegboard are visible at a glance. You spot missing tools quickly and avoid buying duplicates. The open layout lets you grab what you need fast. Easy access saves time and reduces frustration during projects.
Enhanced Tool Protection
Hanging tools prevents damage from tossing them in drawers. Pegboards keep tools off damp surfaces, avoiding rust. Proper placement reduces wear and tear over time. Your tools stay in good shape and last longer.
Credit: www.reddit.com
Choosing The Right Pegboard
Choosing the right pegboard is a key step in organizing tools effectively. The perfect pegboard fits your space and holds your tools safely. Consider the material, size, and how you will mount it. These choices make your workspace neat and easy to use.
Material Options
Pegboards come in different materials like metal, wood, and hardboard. Metal pegboards are strong and last long. They hold heavy tools without bending. Wood pegboards look nice but can wear out faster. Hardboard pegboards are affordable and easy to cut. Pick a material that fits your tool weight and style.
Size And Layout Considerations
Measure your wall space before choosing a pegboard. Pick a size that fits your tools and leaves room to grow. Think about the layout. Arrange tools by type or size. Use a bigger pegboard for many tools. A smaller one works well for fewer items. Plan the layout to keep tools easy to reach.
Mounting Techniques
Mounting keeps your pegboard stable and safe. Use screws and anchors for heavy pegboards. Make sure the board sits flat on the wall. Some pegboards come with mounting kits. Others need extra support like wooden spacers. Choose a method that suits your wall type and pegboard material.
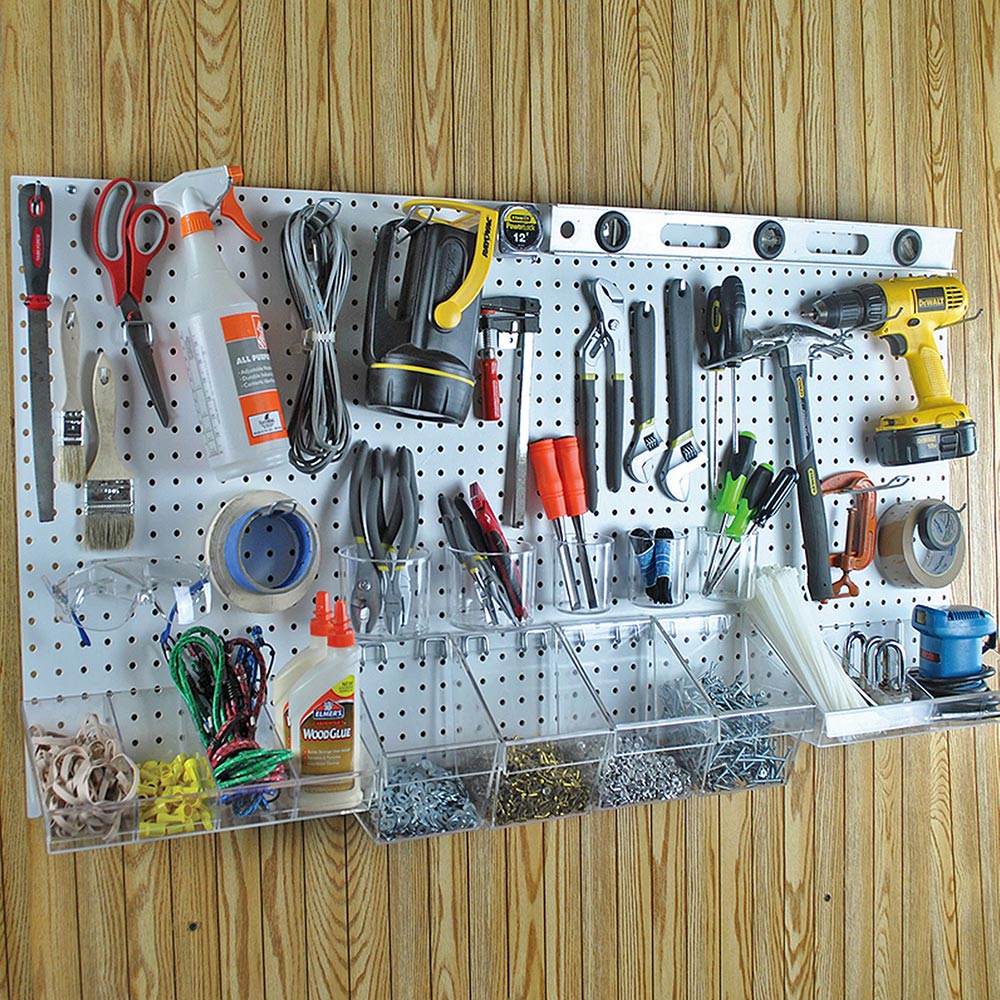
Essential Pegboard Accessories
Essential pegboard accessories help keep your tools neat and easy to find. They make your workspace tidy and save time. Choosing the right accessories allows you to customize your pegboard for any tool size or shape.
Hooks And Hangers
Hooks and hangers are the most basic pegboard accessories. They hold items like screwdrivers, hammers, and wrenches. Different hook sizes fit small or large tools. You can place hooks anywhere on the pegboard. This flexibility helps you organize tools by type or size.
Shelves And Bins
Shelves and bins add extra storage space on your pegboard. Shelves hold heavier or oddly shaped tools. Bins store small parts like nails, screws, and bolts. Both keep items visible and within reach. You can label bins for faster tool finding.
Specialty Holders
Specialty holders fit unique tools that hooks cannot hold well. Examples include drill holders, tape measure clips, and plier racks. They secure tools safely and prevent falling. Using these holders keeps your workspace organized and efficient.
Credit: www.homedepot.com
Planning Your Pegboard Layout
Planning your pegboard layout is the first step to a neat and efficient workspace. A good plan saves time and reduces clutter. It makes tools easy to find and use. Careful layout helps keep your work area tidy and productive.
Grouping Tools By Function
Group tools that serve the same purpose together. Keep all screwdrivers in one section. Place pliers and wrenches nearby. This method helps find tools quickly. It also makes cleaning and restocking easier.
Prioritizing Frequently Used Items
Put your most used tools at eye level. Keep them within easy reach. Store less used items higher or lower on the board. This saves time and effort during work. It keeps your space organized and efficient.
Creating Zones For Different Tasks
Divide your pegboard into zones by task type. Have one zone for woodworking tools. Another for electrical tools. This separation helps focus on the job. It keeps tools organized by their use.
Installing And Arranging Tools
Installing and arranging tools on a pegboard makes your workspace neat and easy to use. Proper setup saves time and reduces clutter. A well-organized pegboard keeps tools visible and within reach. Follow simple steps to install hooks and holders correctly. Arrange tools for quick access and good balance.
Step-by-step Installation Tips
Start by choosing a sturdy pegboard and secure it to the wall. Use a level to ensure it is straight. Mark spots for hooks based on tool sizes. Attach hooks firmly to avoid slipping. Hang larger tools first to plan space. Add smaller tools around them. Test each hook’s strength before placing heavy tools.
Using Templates For Precision
Create or print templates of your tools’ outlines. Tape templates to the pegboard for clear placement guides. Mark hook positions on the templates. This method helps keep tools organized and consistent. It prevents overcrowding and wasted space. Templates also make it easy to return tools to the right spot.
Maintaining Balance And Accessibility
Distribute tools evenly to avoid heavy spots on the pegboard. Place frequently used tools at eye level. Less used tools can go higher or lower. Group similar tools together for easy finding. Keep sharp or dangerous tools out of children’s reach. Regularly review the layout to improve access and safety.
Maintaining A Tidy Pegboard Workspace
Maintaining a tidy pegboard workspace helps keep tools easy to find and use. A clean and organized pegboard saves time during projects. It also extends the life of your tools and workspace. Regular care keeps everything in good condition and ready to work.
Regular Cleaning And Inspection
Dust and dirt can build up on pegboards and tools. Wipe the pegboard with a dry cloth often. Check hooks and holders for rust or damage. Remove any broken or bent hooks to avoid accidents. Clean tools before placing them back on the board. This prevents grime from spreading.
Updating Tool Arrangement
Change your tool layout as your needs change. Group tools by type or project for faster access. Move frequently used tools to eye level or easy reach. Remove tools you no longer use to free space. Keep the board flexible for adding new tools later.
Incorporating Labels And Color Coding
Labeling tool spots helps you find items quickly. Use clear labels or simple pictures for easy reading. Color code hooks or tool handles for quick identification. This system helps everyone know where each tool belongs. It reduces clutter and misplaced tools over time.
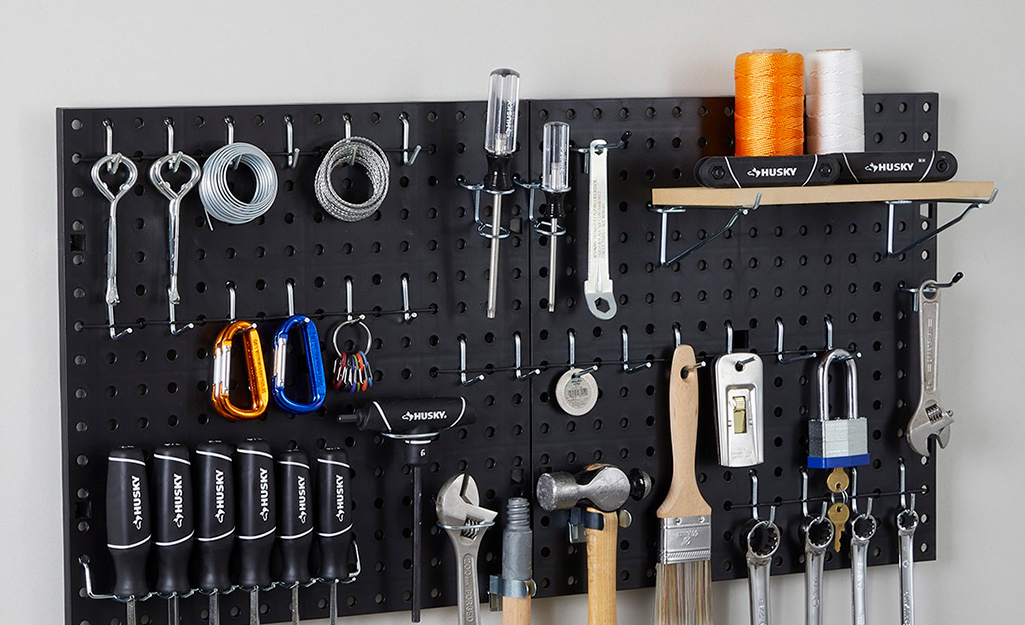
Creative Ideas For Customized Pegboards
Customizing your pegboard turns a simple tool holder into a smart workspace. It helps you find tools faster and keeps your area neat. Creative touches make your pegboard both useful and attractive.
Small changes can add big value. These ideas show how to make your pegboard unique and efficient.
Adding Lighting Features
Lighting brightens your pegboard and your work area. LED strip lights are easy to install along the edges. They make tools visible even in low light. Battery-powered lights are a good option if you lack outlets. Good lighting reduces eye strain and speeds up work.
Integrating Magnetic Strips
Magnetic strips hold small metal tools like screwdrivers and pliers. Attach strips horizontally or vertically for easy access. They save space and keep tools secure. Magnets help you organize items that don’t fit well on hooks. This method keeps frequently used tools within reach.
Personalizing With Paint And Decor
Painting your pegboard adds color and style. Use bright colors to make tools stand out. Stencils or patterns give a unique look. Adding small shelves or baskets increases storage options. Personal touches make your workspace inviting and fun.
Credit: www.homedepot.com
Frequently Asked Questions
What Tools Work Best On A Pegboard?
Hand tools like hammers, screwdrivers, wrenches, and pliers work best on pegboards. Lightweight power tools can also be hung securely. Use hooks, holders, and baskets designed for pegboards to maximize organization and accessibility.
How Do I Maximize Pegboard Storage Space?
Arrange tools by size and frequency of use to maximize storage. Use various hooks and shelves to hold different tool types. Group similar tools together for easy access and maintain clear labeling to keep the pegboard tidy and efficient.
Can Pegboards Handle Heavy Tools Safely?
Pegboards can hold heavy tools if you use strong, metal hooks and secure the board to wall studs. Reinforce the board if needed and distribute weight evenly. Avoid overloading single hooks to prevent damage or accidents.
How Do I Maintain An Organized Pegboard?
Regularly return tools to their designated spots after use. Clean the pegboard and hooks periodically to avoid dust buildup. Reassess tool arrangement occasionally to improve efficiency and accommodate new tools or changing needs.
Conclusion
Organizing pegboard tools saves time and keeps your space neat. You can find tools quickly and avoid clutter. Simple steps like grouping tools by use make a big difference. Regularly check and adjust your setup for better efficiency. A tidy workspace helps you work faster and feel less stressed.
Start organizing today and enjoy a smoother workflow tomorrow.