


Are you tired of digging through messy drawers or rummaging through cluttered toolboxes every time you need a screwdriver or hammer? Organizing your tools on a pegboard can transform your workspace instantly.
Not only does it keep everything within easy reach, but it also saves you time and frustration. Imagine walking up to your pegboard and seeing every tool neatly hung, ready for action. In this guide, you’ll discover simple, practical steps to arrange your tools efficiently and make your work area a place you actually enjoy spending time in.
Keep reading to unlock the secret to a perfectly organized tool setup!
Choosing The Right Pegboard
Choosing the right pegboard sets the stage for an organized workspace. It affects how you store and reach your tools. Picking the best type and size makes your pegboard useful and durable. Consider mounting options early to match your wall and tools.
Material Options
Pegboards come in metal, wood, and hardboard. Metal pegboards last long and hold heavy tools. Wood pegboards look nice but may wear out fast. Hardboard pegboards are cheap and easy to cut. Choose material based on your tool weight and style needs.
Size And Placement
Measure your wall space before buying a pegboard. Bigger boards hold more tools but need more room. Place the pegboard where you work most. Keep it at eye level for easy access. Plan space for future tool additions.
Mounting Techniques
Mount pegboards with screws, adhesive strips, or hooks. Screws offer strong support for heavy tools. Adhesive strips work for light tools and smooth walls. Hooks are best for quick removal and adjustment. Secure mounting prevents pegboard from falling.
Essential Pegboard Accessories
Essential pegboard accessories help keep your tools neat and easy to find. They make organizing simple and save space. Choosing the right accessories lets you customize your pegboard to fit your needs. Each type serves a special purpose for different tools and items.
Hooks And Holders
Hooks and holders are basic pegboard accessories. They hold tools like hammers, wrenches, and screwdrivers. Hooks come in many shapes and sizes. Some are straight, others have a curve or clip. Holders can support pliers, tape, or drills. These accessories keep tools visible and easy to grab.
Bins And Shelves
Bins and shelves add storage for small parts and items. Use bins for screws, nails, and bolts. Shelves can hold paint cans or larger tools. They keep everything off your workbench and tidy. These accessories help sort small pieces and prevent clutter.
Magnetic Strips
Magnetic strips stick to pegboards and hold metal tools. They are perfect for knives, screwdrivers, and drill bits. Magnets keep tools secure and easy to reach. This accessory reduces the need for hooks. It also makes changing tool layout quick and simple.
Organizing Tools By Type
Organizing tools by type on a pegboard helps keep your workspace neat and efficient. Grouping similar tools together makes finding the right one quick and easy. It also saves space and prevents clutter. Sorting tools by type helps you know exactly where each item belongs.
Hand Tools
Place hand tools like hammers, screwdrivers, and pliers in one section. Use hooks or holders to keep them visible and accessible. Arrange them by size or function for faster use. Keep frequently used hand tools at eye level. Smaller tools can hang on smaller hooks to save space.
Power Tools
Power tools need sturdy hooks or shelves for support. Hang drills, sanders, and saws carefully to avoid damage. Keep cords tidy by wrapping them neatly or using cord holders. Store heavier tools lower on the pegboard to prevent accidents. Labeling spots helps return tools to their place quickly.
Measuring Instruments
Measuring tools like tape measures, levels, and squares should be easy to reach. Use small shelves or clips to hold these items securely. Group similar measuring tools together for convenience. Keeping these tools visible helps maintain accuracy and speed. Avoid stacking to prevent wear and tear.
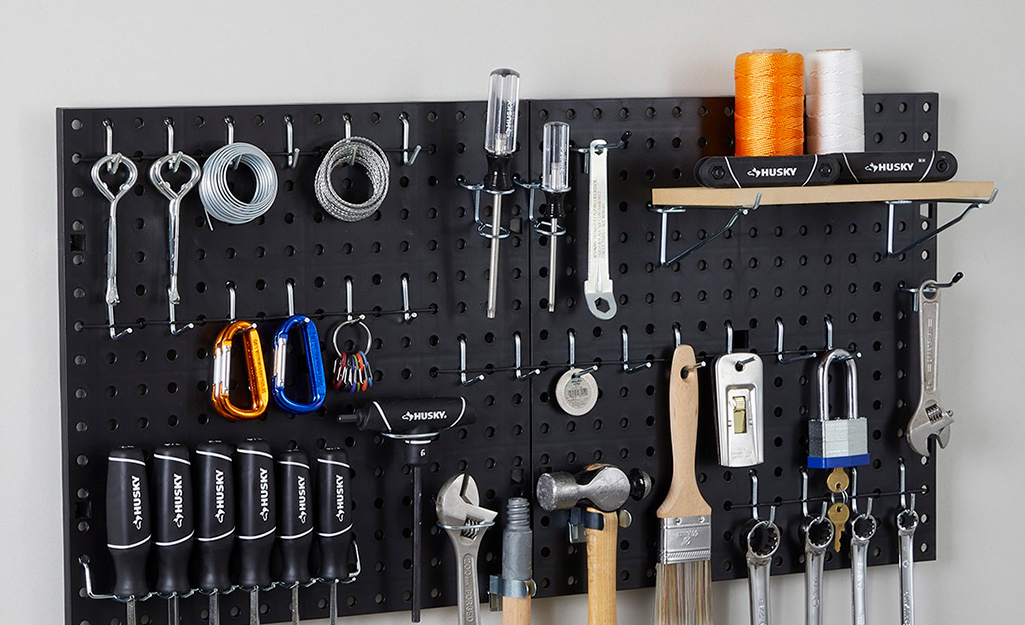
Credit: www.homedepot.com
Maximizing Space Efficiency
Maximizing space on a pegboard helps keep your tools easy to find and use. It also keeps your workspace neat and tidy. Using smart methods to organize tools saves time and avoids clutter. Small adjustments make a big difference in efficiency.
Vertical Arrangement
Arrange tools vertically to use wall height well. Hang long tools like screwdrivers and wrenches in a straight line. This method frees up horizontal space for other items. Vertical placement makes tools easy to spot and grab.
Grouping Similar Items
Group tools by type or use. Keep all pliers together, all hammers in one spot. Grouping cuts search time and keeps the board organized. It also helps to quickly see if a tool is missing.
Using Multi-tiered Hooks
Multi-tiered hooks allow stacking tools in layers. They use vertical space effectively without cluttering. Hang smaller tools on the top tier and larger ones below. This method maximizes pegboard space and keeps tools visible.
Labeling And Accessibility
Labeling and accessibility are key for an organized pegboard. Clear labels help you find tools quickly. Easy reach saves time and effort. Keeping everything in order makes your workspace neat and efficient.
Labeling Methods
Use simple labels with clear words. Write tool names or draw small pictures. Use a label maker for neat text. Stick labels above or below each hook. Color code labels to group similar tools. This helps you spot tools at a glance.
Easy Reach Strategies
Place often-used tools at eye level. Hang heavier tools lower for safety. Keep small tools in easy-to-grab containers. Arrange tools by size or type. Leave space between tools for easy removal. This makes your work faster and less frustrating.
Maintaining Order
Return tools to their labeled spots after use. Check labels regularly for wear or damage. Adjust pegboard layout as your tool collection grows. Clean the pegboard and hooks often. A tidy pegboard encourages good habits and saves time.
Creative Pegboard Layout Ideas
Creative pegboard layouts make tool organization both fun and efficient. They help you find tools quickly. They also make your workspace look neat and inviting.
Try different ideas to fit your style and needs. Use shapes, colors, and lights to enhance your pegboard’s look. Each method adds a unique touch to your tool storage.
Custom Shapes
Cut pegboard pieces into shapes that match your tools. For example, a wrench-shaped section for all wrenches. This saves space and adds a personal touch. It makes tools easy to spot at a glance.
Color Coding
Assign colors to different tool groups. Use colored hooks or paint behind tool areas. Red for screwdrivers, blue for pliers, green for hammers. Color coding speeds up finding what you need. It also keeps your pegboard organized and clear.
Incorporating Lighting
Add LED strips or small lights around your pegboard. Good lighting brightens the workspace. It helps you see tools clearly, even in low light. Lights also create a professional and clean look for your pegboard.
Maintenance And Upkeep
Maintaining and caring for your pegboard tools keeps your workspace neat and safe. Regular upkeep helps tools last longer and stay easy to find. A tidy pegboard also makes work faster and less stressful.
Regular Cleaning
Dust and dirt can build up on your pegboard and tools. Use a soft cloth or brush to remove dust weekly. Clean tools with a damp cloth to remove grease and grime. Avoid harsh cleaners that can damage your tools or pegboard. Keeping the area clean prevents rust and keeps tools in good shape.
Rearranging Tools
Change your pegboard layout as your needs change. Move tools to spots that feel more comfortable or faster to reach. Group tools by type or how often you use them. Rearranging keeps your workspace efficient and avoids clutter. It also helps spot missing or broken tools quickly.
Checking For Wear
Look over your tools and pegboard hooks regularly. Check for rust, cracks, or loose parts. Replace worn hooks to prevent tools from falling. Fix or replace damaged tools to keep your work safe. Early checks stop small problems from becoming big ones.
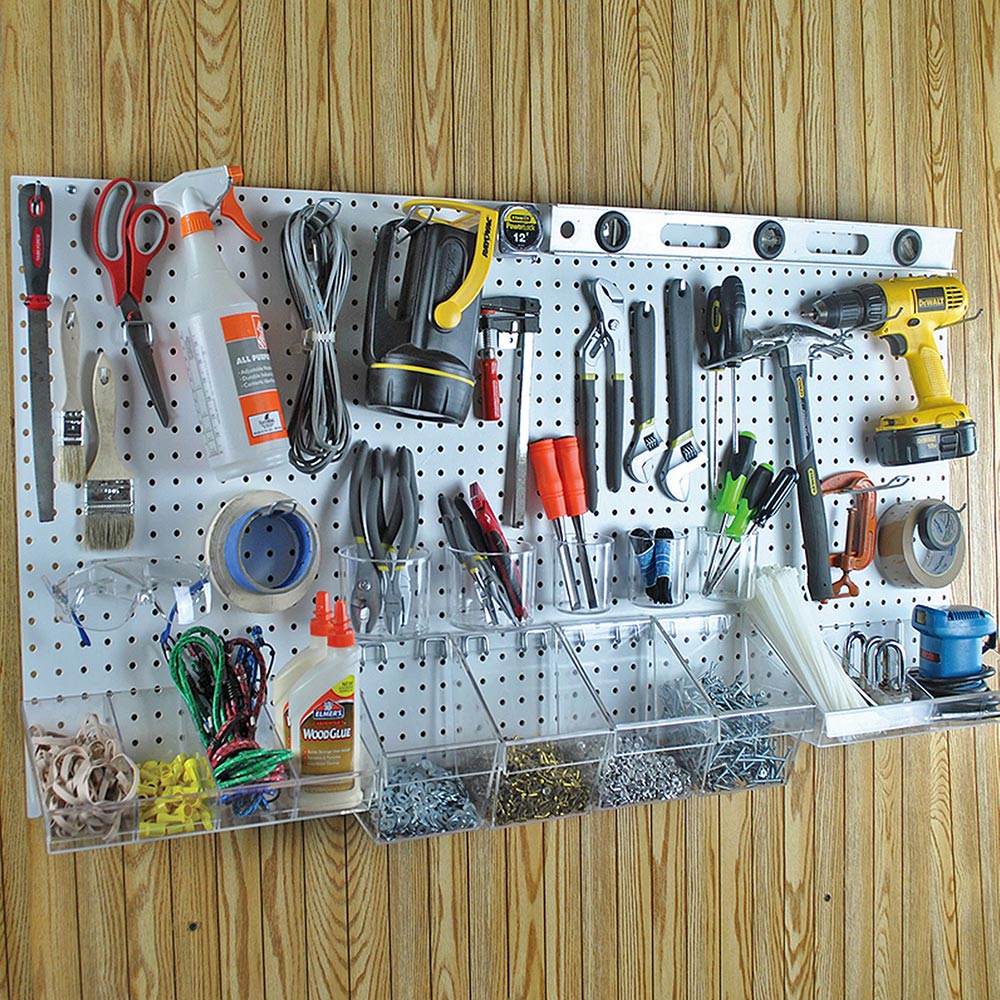
Credit: www.homedepot.com
Credit: www.reddit.com
Frequently Asked Questions
How Do I Start Organizing Tools On A Pegboard?
Begin by sorting tools by type and size. Plan pegboard layout for easy access. Use hooks and holders to secure tools efficiently.
What Are The Best Pegboard Accessories For Tools?
Use hooks, bins, shelves, and magnetic strips. These accessories keep tools visible and organized. Choose accessories based on your tool types.
How Can I Maximize Space On A Pegboard?
Group similar tools together and use vertical space. Use multi-tool holders and adjustable hooks. Keep frequently used tools within arm’s reach.
How Do I Maintain Tool Organization On A Pegboard?
Regularly return tools to their designated spots. Clean the pegboard to avoid dust buildup. Reassess layout periodically for efficiency improvements.
Conclusion
Organizing tools on a pegboard saves time and space. You find tools quickly and keep your workspace neat. Simple steps make the process easy for everyone. Arrange tools by size or use to stay efficient. Change the layout as your tool collection grows.
A tidy pegboard helps you work better every day. Start organizing today and enjoy a cleaner workshop.