

Are you looking to make your photos stand out with brighter highlights and enhanced details? The Dodge Tool in Photoshop is your secret weapon to do just that.
It lets you lighten specific areas of your image, giving you more control over the mood and focus of your picture. In this guide, you’ll learn exactly how to use the Dodge Tool step-by-step, so you can easily enhance your photos like a pro.
Ready to unlock the full potential of your images? Let’s dive in and transform your editing skills right now.
Dodge Tool Basics
The Dodge Tool in Photoshop is used to lighten areas of an image. It helps brighten specific parts without changing the whole picture.
This tool is useful for enhancing details or fixing shadows on photos. Learning its basics will improve your photo editing skills.
What Is The Dodge Tool
The Dodge Tool lightens parts of an image by increasing brightness. It works like a virtual paintbrush that brightens pixels as you paint over them.
It is often used to bring out details in dark areas or to add highlights for better contrast.
Where To Find It
You can find the Dodge Tool in the Photoshop toolbar on the left side of the screen. It shares a spot with the Burn and Sponge tools.
Look for an icon that looks like a magnifying glass or a lollipop shape. Click and hold the icon to see the Dodge Tool option.
Key Settings Explained
The Dodge Tool has several settings that control how it works. These settings help you adjust the effect on your image.
- Range:Choose which tones to lighten—shadows, midtones, or highlights.
- Exposure:Controls the strength of the lightening effect, from low to strong.
- Brush Size:Changes the size of the area you paint on.
- Brush Hardness:Adjusts the edge softness of the brush for smooth or sharp lightening.

Credit: photoshopcafe.com
Preparing Your Image
Before using the Dodge Tool in Photoshop, you need to prepare your image. This helps you make better edits and keep your work safe. Good preparation saves time and keeps your image clean.
Preparing includes organizing layers, picking the right areas to lighten, and setting up safe editing methods. These steps help you control the effect of the Dodge Tool.
Working With Layers
Use layers to keep your edits separate from the original image. This way, you can change or remove changes later. Always duplicate the background layer before starting.
Label your layers to stay organized. Use different layers for different edits. This makes it easier to control the lightening effect in specific areas.
- Duplicate the background layer
- Rename layers for easy tracking
- Use new layers for each edit
Choosing The Right Areas To Brighten
Pick areas that need more light to improve the image. Avoid brightening skin too much or large flat areas. Focus on highlights and important details.
Use the Dodge Tool carefully on edges and textures. This keeps your image natural and balanced. Brighten only where it adds value.
- Target highlights and bright spots
- Avoid over-brightening skin or shadows
- Use small brush sizes for details
- Work slowly for better control
Setting Up Non-destructive Edits
Non-destructive edits let you change or undo work anytime. Use separate layers or masks to protect the original image. This method keeps your file flexible.
Create a new layer set to “Overlay” or “Soft Light.” Paint with a soft brush in white to dodge areas. This avoids permanent changes and keeps edits easy to adjust.
- Use new layers for dodge work
- Set layer blend mode to Overlay or Soft Light
- Paint with white on the new layer
- Use layer masks to control effect
Techniques For Effective Brightening
The Dodge Tool in Photoshop helps to brighten parts of your image. It works by lightening specific areas to add focus or improve details.
Using the tool correctly can make your photo look natural and balanced. The key is to control exposure and target the right tones.
Using Exposure Controls
The Dodge Tool lets you adjust the exposure level. Lower exposure gives subtle brightening, while higher exposure makes areas much lighter.
- Set exposure between 5% and 20% for gentle effects.
- Apply several light strokes rather than one heavy stroke.
- Use a soft brush to avoid hard edges.
- Zoom in to work on small areas with better control.
Targeting Highlights, Midtones, And Shadows
You can choose which tones to brighten using the Dodge Tool’s range options. Each range affects different parts of the image’s brightness.
| Range | Effect |
| Highlights | Brightens the lightest parts of the photo |
| Midtones | Lightens the middle brightness areas |
| Shadows | Brightens dark areas without washing out details |
Choose the right range to avoid over-brightening and keep the photo looking natural.
Blending For Natural Results
Blending brightened areas with the rest of the image is important. Use soft brushes and light strokes to blend smoothly.
Tips for smooth blending:
- Use the “Fade” command immediately after dodging to reduce effect strength.
- Work on a duplicate layer to keep the original safe.
- Use layer masks to control where brightening appears.
- Adjust brush hardness and opacity for better blending.
Advanced Tips And Tricks
The Dodge Tool in Photoshop helps lighten parts of your image. Using it well can improve your photos a lot.
Here are some advanced tips to use the Dodge Tool better and faster.
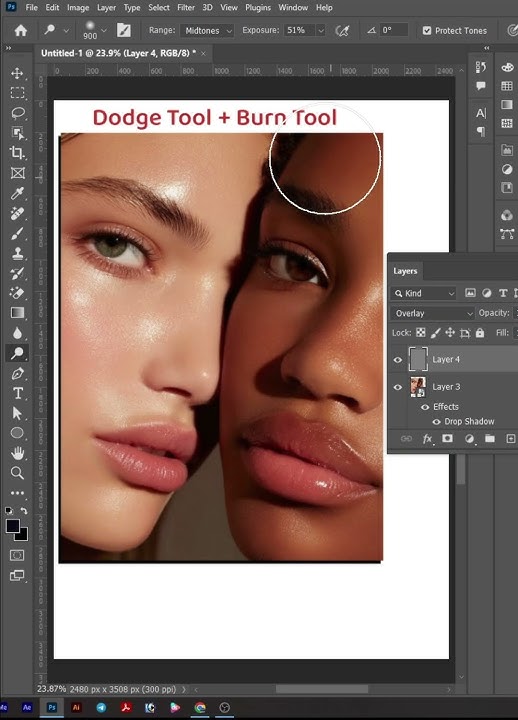
Combining Dodge With Burn Tool
The Dodge Tool lightens areas, and the Burn Tool darkens them. Use both for more depth and detail.
Switch between Dodge and Burn to fix shadows and highlights in your photo. This makes images look more real.
- Use Dodge on highlights to brighten key areas
- Use Burn on shadows to add contrast
- Work slowly with low exposure for smooth results
Using Masks For Precision
Masks help you control where the Dodge Tool works. This stops changes from affecting the whole image.
Paint on masks to protect areas you want to keep safe. This keeps your edits clean and exact.
- Create a new layer and add a mask to it
- Use a soft brush to paint black on areas to hide effects
- Switch to white brush to reveal Dodge effects again
Shortcut Keys To Speed Up Workflow
Use keyboard shortcuts to switch tools fast. This saves time and keeps your flow steady.
Learn these keys to move quickly between Dodge, Burn, and other tools.
- Press Oto select Dodge or Burn Tool
- Hold Alt (Option)while using Dodge to switch to Burn temporarily
- Use Shift + Oto toggle between Dodge, Burn, and Sponge
- Adjust brush size with [and ]keys
Common Mistakes To Avoid
Using the Dodge Tool in Photoshop can brighten parts of your image. It can help draw attention or fix shadows. Yet, many users make mistakes that reduce the quality of their work.
Knowing what to avoid will make your edits look natural and clean. Below are common errors to watch out for when using the Dodge Tool.
Over-brightening Areas
Brightening too much is a common error. It can make parts of the photo look fake or washed out. Be careful not to overdo the lightening.
- Use a low exposure setting on the Dodge Tool.
- Apply multiple gentle passes instead of one strong pass.
- Check your work by toggling the layer visibility.
- Focus only on small areas that need lightening.
- Avoid brightening skin too much to keep it natural.
Ignoring Image Noise
Brightening can increase noise, especially in dark or low-quality images. Noise looks like grain or specks and lowers image clarity.
| Problem | Solution |
| Noise appears after dodging | Use noise reduction filters before or after dodging |
| Low-resolution images show grain easily | Work with high-resolution files when possible |
| Dodging shadows increases grain | Apply dodge tool carefully in shadow areas |
Not Using Layers Properly
Many users dodge directly on the background layer. This makes changes permanent and hard to fix. Using layers can keep your work flexible.
Follow these tips for layers:
- Create a new layer set to “Overlay” or “Soft Light” blending mode.
- Fill the new layer with 50% gray before dodging.
- Use the Dodge Tool on this layer, not the original image.
- Adjust the layer’s opacity to control brightness effect.
- Use layer masks to limit where you dodge.

Credit: glensmith.co.uk
Practical Projects To Practice
The Dodge Tool in Photoshop is great for making your photos pop. It lightens parts of your image. Here are some projects to help you practice.
Try these simple projects to get better at using the Dodge Tool. You’ll learn to brighten portraits, enhance landscapes, and restore old photos.
Brightening Portraits
The Dodge Tool can make faces brighter and more lively. Use it on the eyes and cheeks for a natural glow.
Zoom in to see details better. Apply the tool gently to avoid making the skin look too light.
- Set Dodge Tool to midtones for natural results
- Use a soft brush to blend edges smoothly
- Adjust exposure for subtle light effects
Enhancing Landscape Photos
Landscapes can look more vibrant with the Dodge Tool. Brighten the sky and highlights on water for a striking effect.
Be careful not to overdo it. Too much can make the photo look unnatural.
- Apply the tool to highlight areas like clouds
- Use lower exposure for gradual enhancement
- Combine with Burn Tool for depth
Restoring Old Photos
Old photos often look dull. The Dodge Tool can help restore their brightness. Focus on faces and important details.
Work slowly to preserve the original feel of the photo. Adjust as needed to match the photo’s age.
- Set the tool to highlights for faded areas
- Use a small brush for detailed parts
- Combine with Clone Tool for best results

Credit: issuu.com
Frequently Asked Questions
What Is The Dodge Tool In Photoshop Used For?
The Dodge Tool lightens specific areas of an image. It enhances highlights and adds depth. It is ideal for brightening shadows and creating contrast.
How Do I Adjust The Dodge Tool Settings?
You can change brush size, range, and exposure in the options bar. Adjusting these controls the lightening effect’s strength and area for precision edits.
When Should I Avoid Using The Dodge Tool?
Avoid overusing it on skin tones to prevent unnatural looks. Excessive use can cause loss of detail and unwanted highlights in photos.
Can The Dodge Tool Work On All Image Types?
Yes, it works on raster images like JPEG and PNG. It does not affect vector layers or text directly.
Conclusion
The Dodge Tool in Photoshop brightens parts of your image with ease. Practice helps you control light and shadows better. Use small brush sizes for detailed work. Avoid overdoing it to keep your photo natural. Try different settings to see what fits best.
Keep experimenting to improve your editing skills. This tool adds subtle highlights that make photos stand out. Remember, patience brings better results every time. Enjoy creating brighter and clearer images with this simple tool.