

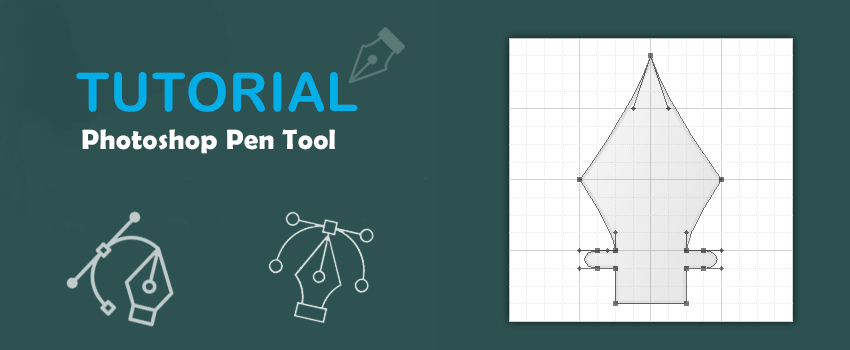
Are you ready to take your Photoshop skills to the next level? Mastering the Pen Tool can open up a world of creative possibilities for you.
Whether you want to create precise shapes, cut out images flawlessly, or design smooth curves, this tool is your best friend. It might seem tricky at first, but once you get the hang of it, you’ll wonder how you ever worked without it.
Keep reading, and you’ll discover simple steps and insider tips to make the Pen Tool work exactly the way you want. By the end, you’ll be crafting perfect paths like a pro. Let’s dive in and transform your Photoshop experience!

Credit: www.youtube.com
Pen Tool Basics
The Pen Tool in Photoshop helps you create precise shapes and paths. It is useful for drawing and editing curved or straight lines.
You can use the Pen Tool for selections, masks, and complex designs. Learning its basics will improve your editing skills.
Tool Location And Access
The Pen Tool is found in the Photoshop toolbar on the left side of the screen. It looks like a fountain pen tip.
You can quickly select it by pressing the letter “P” on your keyboard. This shortcut saves time while working.
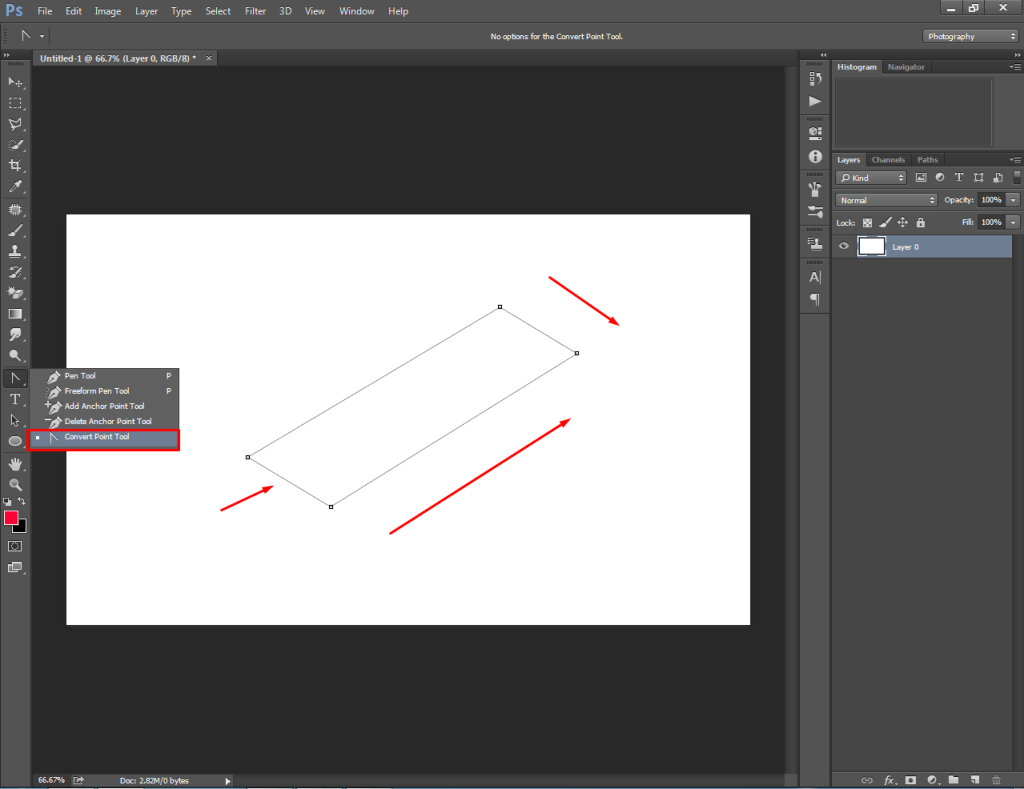
Types Of Pen Tools
Photoshop offers several Pen Tool options to create different paths. Each type serves a unique purpose.
- Pen Tool:Draws standard paths with anchor points.
- Freeform Pen Tool:Draws paths like a pencil, freehand.
- Add Anchor Point Tool:Adds points to existing paths.
- Delete Anchor Point Tool:Removes points from paths.
- Convert Point Tool:Changes points between corner and smooth types.
Understanding Anchor Points
Anchor points control the shape of paths created with the Pen Tool. They mark the start and end of each path segment.
There are two main types of anchor points: corner points and smooth points. Corner points create sharp angles. Smooth points create curves.
- Corner points:Connect straight lines with sharp corners.
- Smooth points:Connect curved lines with handles to adjust the curve.
- Drag handles to change the curve direction and length.
- You can add or remove anchor points to refine your shapes.

Credit: digital-photography-school.com
Creating Straight Paths
The Pen Tool in Photoshop helps you draw straight lines easily. It works by placing points called anchor points.
Connecting these points forms straight paths. These paths can be used for shapes or selections.
Placing And Connecting Points
Click on the canvas to place the first anchor point. Each click adds a new point connected by a straight line.
To close the path, click back on the first point. This creates a complete shape with straight edges.
- Click once to place an anchor point
- Move the cursor and click to add another point
- Lines connect each new point to the last one
- Click the first point to close the path
Adjusting Path Segments
Use the Direct Selection Tool to select anchor points on the path. You can move these points to change the line.
Drag points to new positions. This changes the length and angle of straight segments between points.
- Select the Direct Selection Tool (white arrow)
- Click an anchor point to select it
- Drag the point to adjust the path segment
- Release the mouse to set the new path shape
Drawing Curved Paths
The Pen Tool in Photoshop helps you draw smooth, curved paths. These paths are useful for creating shapes or selecting parts of an image.
Curved paths are made by placing points and adjusting the curve between them. This lets you create precise shapes with smooth edges.
Using Direction Handles
Direction handles control the shape of the curve between points. Each anchor point has two handles that you can move to change the curve.
Drag a handle out from an anchor point to bend the path. The length and angle of the handle affect the curve’s smoothness and direction.
- Click to create an anchor point.
- Drag to pull out direction handles.
- Move handles to adjust the curve shape.
- Handles on both sides control the curve before and after the point.
Modifying Curves Smoothly
You can change curves smoothly by adjusting the direction handles. Use the Direct Selection Tool to select and move handles carefully.
To keep curves smooth, make sure handles are opposite each other in a straight line. This creates a gentle transition between curves.
- Select the anchor point with the Direct Selection Tool.
- Drag one handle to change the curve’s direction.
- Hold Alt (Option on Mac) and drag a handle to move one handle independently.
- Adjust handles until the curve looks smooth and natural.
Credit: clippingway.com
Editing Paths And Shapes
The Pen Tool in Photoshop helps you create and edit paths and shapes. Paths are lines made of points connected by curves or straight segments.
You can change these paths by adding or removing points, changing point types, and moving points with selection tools. This lets you shape your design precisely.
Adding And Deleting Points
Adding points lets you create more detailed paths. Deleting points simplifies paths by removing unnecessary parts. Both help control the shape.
To add a point, select the Pen Tool and click on the path where you want a new point. To delete a point, click on it with the Delete Anchor Point Tool.
- Adding points increases path control
- Deleting points cleans up the shape
- Use these tools to adjust the path’s flow
Converting Point Types
Points can be corner points or smooth points. Corner points create sharp angles. Smooth points create curves.
You can convert points to change how the path flows. Use the Convert Point Tool to click on a point and change its type.
- Corner points have separate handles
- Smooth points have connected handles
- Convert points to adjust path curves
Using The Path Selection Tools
The Path Selection Tool moves entire paths or shapes. The Direct Selection Tool moves individual points and handles.
Use these tools to fine-tune your design by repositioning paths or adjusting curves at specific points.
- Path Selection Tool moves whole paths
- Direct Selection Tool edits individual points
- Adjust handles to change curves smoothly
Working With Paths For Selections
The Pen Tool in Photoshop lets you draw paths to create precise selections. These paths can be shaped exactly around your subject. You can then turn these paths into selections for editing.
Working with paths gives you control over smooth edges and curves. This makes your selections look clean and professional.
Creating Selections From Paths
After drawing a path with the Pen Tool, you can convert it into a selection. This lets you edit just the area inside the path.
- Open the Paths panel from the Window menu.
- Choose the path you want to use.
- Click the “Load path as a selection” button at the bottom of the panel.
- Adjust the feather radius if you want soft edges.
- Click OK to turn the path into an active selection.
Saving And Loading Paths
Saving paths helps you keep your work safe and editable later. You can load saved paths anytime to reuse or adjust selections.
| Action | Description |
|---|---|
| Save Path | Double-click the Work Path in the Paths panel and name it. |
| Load Path | Select the path, then click “Load path as selection”. |
| Delete Path | Select the path and click the trash icon in the Paths panel. |
| Duplicate Path | Right-click the path and choose Duplicate Path. |
Applying Pen Tool For Masks
The Pen Tool in Photoshop is useful for creating precise masks. Masks help isolate parts of an image for editing.
Using masks can improve your photo editing skills. The Pen Tool is great for detailed selections.
Creating Vector Masks
Vector masks are made using paths. Paths are lines and curves drawn with the Pen Tool.
These masks offer flexibility. You can resize them without losing quality.
- Select the Pen Tool from the toolbar.
- Click to place points and create paths.
- Close the path to make a complete shape.
- Turn the path into a vector mask.
Refining Mask Edges
Refining edges makes your masks look natural. Smooth edges blend better with the background.
Photoshop offers tools to refine mask edges. Use these tools to achieve the desired look.
- Use the Feather option to soften edges.
- Adjust the Smooth setting for even lines.
- Apply the Refine Edge brush for fine details.
Combining Pen Tool With Other Tools
The Pen Tool in Photoshop is powerful for creating precise paths. It becomes even more useful when combined with other tools. This guide explores how to use it with shape layers, brushes, and erasers.
These combinations allow for creative flexibility. You can enhance your designs and streamline your workflow. Let’s dive into each method.
Using Pen Tool With Shape Layers
Shape layers can be created using the Pen Tool. This allows for the creation of complex shapes. It offers precise control over your designs.
- Select the Pen Tool and draw your path.
- Right-click and choose “Make Selection”.
- Go to Layer > New Fill Layer > Solid Color.
- Choose your desired color for the shape.
Integrating With Brush And Eraser
The Pen Tool can define areas for brushing or erasing. This technique gives you control over where these tools apply. It is useful for detailed work.
- Use the Pen Tool to draw a path.
- Convert the path to a selection.
- Switch to the Brush Tool to paint within the selection.
- Use the Eraser Tool to remove areas within the selection.
Experiment with these combinations to enhance your Photoshop skills. Each method opens new possibilities for your projects.
Tips For Precision And Creativity
The Pen Tool in Photoshop is great for drawing shapes and paths. It helps create smooth and precise lines. Using it well takes some practice and good habits.
These tips focus on improving your control and creativity with the Pen Tool. They cover zooming, shortcuts, and drawing complex shapes.
Using Zoom And Guides
Zooming in lets you see details and place points exactly. Guides help keep lines straight and shapes balanced. You can use rulers and grids for extra help.
- Press Ctrl + Plus (+) to zoom in closely.
- Use Ctrl + Minus (-) to zoom out.
- Turn on rulers by pressing Ctrl + R.
- Drag from rulers to create guides.
- Snap points to guides to keep shapes aligned.
Mastering Keyboard Shortcuts
Keyboard shortcuts speed up your work with the Pen Tool. They let you switch tools and adjust points quickly without using the mouse.
| Shortcut | Action |
| P | Select Pen Tool |
| Ctrl + Click | Select a path point |
| Alt + Drag | Adjust curve handles |
| Spacebar | Move the canvas while drawing |
| Ctrl + Z | Undo last action |
Practicing Complex Shapes
Start with simple shapes to build confidence. Then try creating shapes with curves and angles. Break the shape into parts if it is hard to draw all at once.
Practice tips:
- Draw basic shapes like triangles and circles first.
- Use fewer anchor points for smoother curves.
- Adjust handles carefully to control curves.
- Combine straight and curved segments for interesting shapes.
- Keep practicing daily to improve accuracy.
Frequently Asked Questions
What Is The Pen Tool Used For In Photoshop?
The Pen Tool is used to create precise paths and shapes. It helps in making smooth curves and straight lines for selections, masks, and custom shapes in Photoshop.
How Do I Create Curves With The Pen Tool?
Click to create anchor points, then drag to form curves. Adjust the handles to control the curve’s shape and smoothness precisely.
Can I Edit Paths After Drawing With The Pen Tool?
Yes, you can use the Direct Selection Tool to move anchor points or handles. This lets you refine and perfect your paths anytime.
How Do I Convert A Path To A Selection Using The Pen Tool?
Right-click the path and choose “Make Selection. ” This converts your path into a selection for editing or masking.
Conclusion
Using the Pen Tool in Photoshop can feel tricky at first. Practice drawing simple shapes to build confidence. Adjust anchor points to create smooth curves and sharp lines. Take your time and experiment with each step. Soon, you will create clean, precise paths easily.
This skill improves your design work and opens new creative options. Keep practicing regularly to get better every day. The Pen Tool is a strong tool worth learning well.